Maps Tab
Click the Maps tab to view available physical, genetic, and scaffold maps. Available data includes all data installed with the Persephone application and customer-specific imported data. A map set contains a set of maps from an experiment or publication. Map sets typically contain a group of chromosomes or linkage groups. You can open a plate for each Map Name contained in the Map Set. The Map or plate has to contain at least one vertical track of data.
You can view and manipulate one plate or multiple plates on the stage at the same time.
Click the following links for more information:
- Map Types
- Selecting a Map (Map Browser)
- Map Details
- Track Panels
- Gene and Gene Data Track Information
- Markers and QTLs on Physical and Genetic Maps
- Horizontal View
- Comparing Maps
- Marker Details
- Gene Details
- Cytoband Details
- Connector Details
Maps Overview
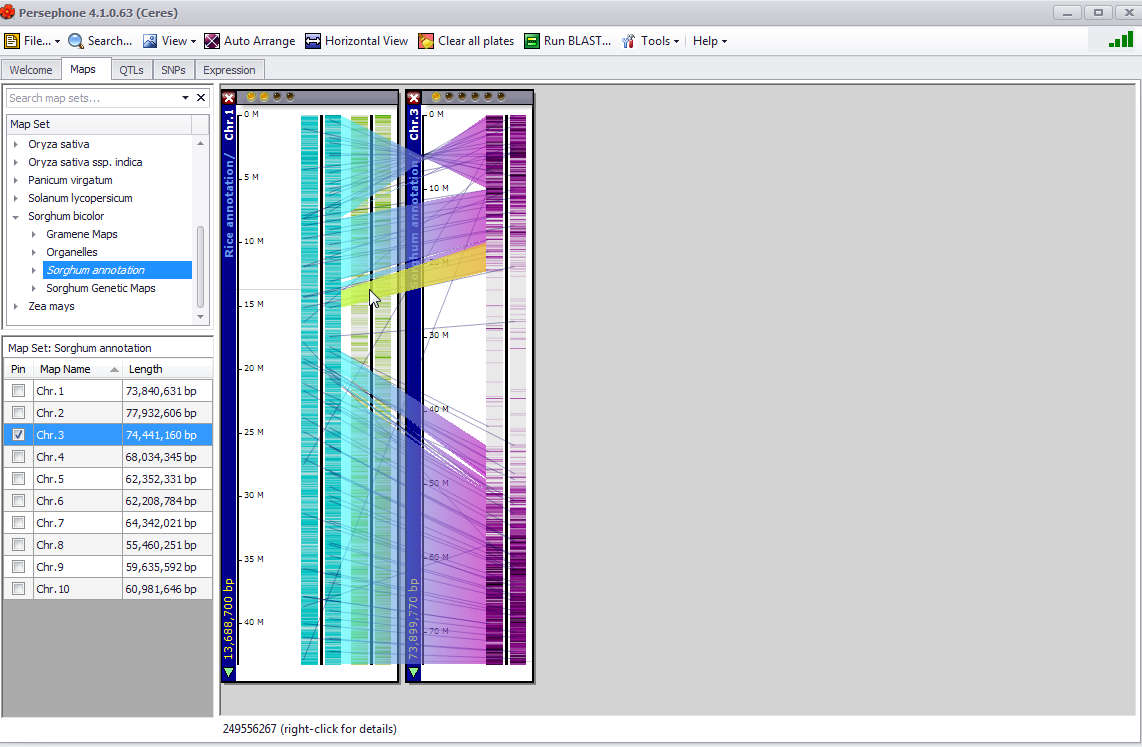
Maps are displayed in Persephone as freely movable "plates". They can be scaled up and down, closed and auto-arranged. Each plate can have one or more vertical "data tracks", which display data. The portion of the screen where the plates are displayed is called the "stage". Plates can be moved anywhere on the stage.
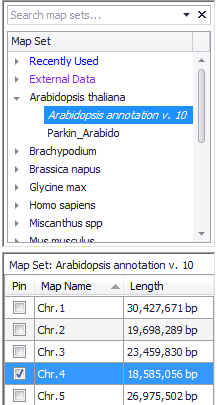
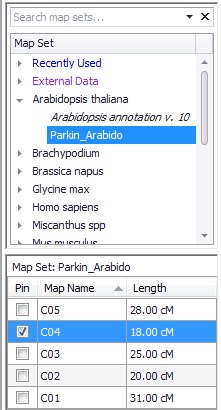
The available map sets are displayed by organism in the Map Set window on the left (see the figure below). An organism can have one or more physical and/or genetic and/or scaffold map sets. A map set is typically composed of the chromosomes of a genome. Physical map set nodes are always shown in italics in the Map Set selection window (left figure below). Genetic map set nodes are not italicized (right figure below). If you double click on one species in the window, for example, Arabidopsis thaliana, two map set entries appear: a genetic map set (Parkin_Arabido) above and a physical map set below (Arabidopsis annotation v. 10). Notice again that only the physical map name is italicized.
|
|
|
If you click on the physical map, a set of Map Names appears in the bottom part of the window. Every time you choose a map it will be displayed on the stage and replace all previous maps. A plate can be "pinned down" by checking the Pin checkbox in the list of available maps which will pin this map to the stage. The pinned-down plates will remain on the stage until you explicitly close them by clicking on the X in the upper left corner of the plate or by right-clicking on the plate and selecting the Close plate item from the right-click menu that will be displayed. If you unclick the Pin checkbox, a map will close only if there is a pinned map to the right of it.
The Settings dialog contains a checkbox that will turn on/off auto-pinning (Tools>Settings>Plate display>Auto pin-down newly added plates). (See Settings.) When this is checked, any newly added plate will be automatically pinned down. Note that although a plate is "pinned", it can still be moved around on the stage.
Panel Track Scroll Bar
To ensure large datasets can be viewed and navigated in Persephone, if a data track associated with a map (chromosome, for example) is too wide, Persephone enables a scroll bar at the bottom of the track as shown in the example below.
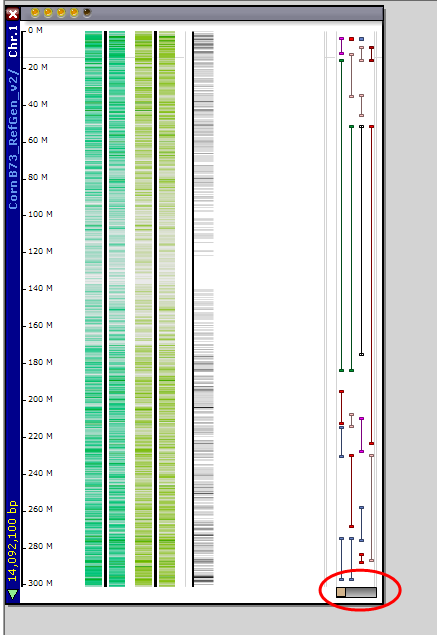
Use this scroll bar to display the hidden portions of the track. In addition, similar to other apps, you can grab the edge of the track and pull to increase the width of the track to see more information without scrolling.
Horizontal View
The horizontal view is an additional view of selected regions of a Map which provides single base pair resolution. To select a region to view horizontally, hold down the Ctrl key and drag using the left mouse button. The direction the mouse is dragged determines the orientation of the selection. A green downward arrow indicates the positive (+) (sense) strand and a red upward arrow is the negative (-) (anti-sense) strand.
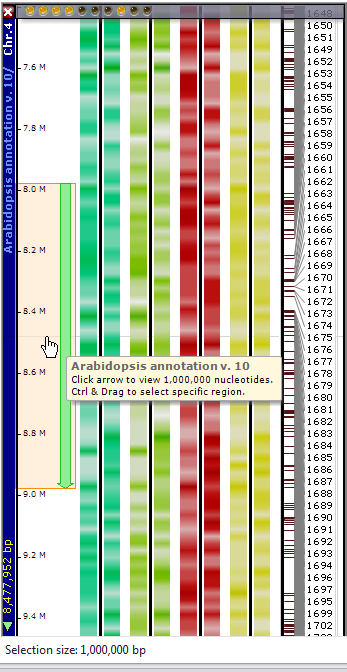
By clicking on the selected, highlighted region (green arrow above), a Horizontal View of the region will be displayed along with all of the same data tracks open in the vertical view. You can also select a region by clicking on the Horizontal View button on the toolbar which activates a selection window of 1Mbp (million base pairs). Once the button is selected, place your cursor over the target region of the map and click on the highlighted green arrow to launch the horizontal view for that region.
See Horizontal View for more information.
 Copyright © 2009-2024 by Persephone Software. All Rights Reserved.