Set Up the API (Cerberus) Server under IIS
Update:
The new version of API server can run as a stand-alone application (SelfHostingCerberus) that does not require a pre-installed Web server.
Warning: The rest of this section is describing an older version of Cerberus that runs under IIS. It is considered obsolete.
We recommend to get familiar with some security tips in the section below.
If, for some reason, you prefer to run Cerberus on top of an existing web server, or would like to use Windows authentication, please follow the steps below.
Perform the following required steps to configure your Cerberus API server:
Note
You can use Linux with Mono instead of Windows IIS. See http://www.mono-project.com/docs/about-mono/supported-platforms/linux/ for more information.
- Step 3: Configure the Cerberus URL in the Persephone Configuration File
- Step 4: Configure the System and Default Database Connections in the Cerberus Configuration File.
- Step 5: Configure the Log File Directory in the Persephone Configuration File
In addition, you can perform the following optional procedures for your Cerberus server:
To verify that you're using Windows authentication or you are using the correct Cerberus server perform one of the following optional procedures:
Important Note
The procedures on this page require modifications to the Persephone.exe.config (used by Persephone) and Web.config (used by Cerberus) files, which are critical files used by the Persephone application. Therefore, you should make backup of these files before proceeding.
In addition, if you modify the Persephone.exe.config file you will need to use MageUI.exe, a free application that is part of Microsoft's .NET Software Developer's Kit (SDK), to edit the this file and adjust the checksum since Persephone uses a checksum to verify this file. Refer to Microsoft's "MageUI.exe (Manifest Generation and Editing Tool, Graphical Client)" page for more information.
Step 1: Configure Your Windows Server
- Open Server Manager on your Windows server.
- Click Local Server.
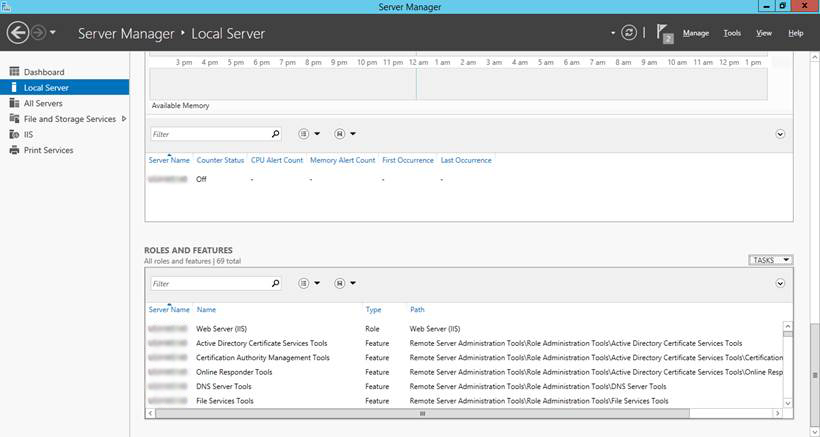
- From the Manage drop-down list select Add Roles and Features.
- On the Before You begin tab confirm your server settings and then click Next.
- On the Select installation type tab select Role-based or feature-based installation and then click Next.
- On the Select destination server tab select your Cerberus server and then click Next.
- On the Server Roles page under Web Server (IIS) > Web Server > Application Development > select (check) ASP.NET 4.5, ISAPI Extensions, and ISAPI Filters as shown in the figure below and then click Next.

- On the Confirm installation selections tab review your configuration and then click Install. The following progress tab will be displayed.
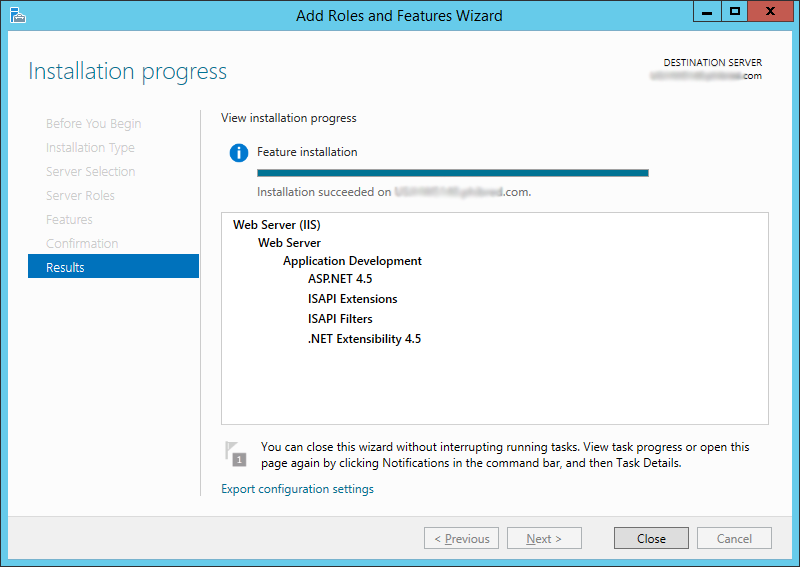
- When the installation is complete click Close to exit the wizard.
- Close the Server Manager application.
Step 2: Set Up Windows IIS
- Open IIS Manager.
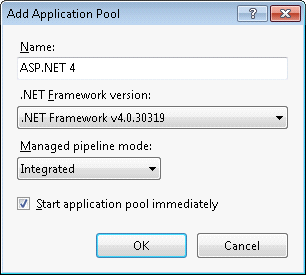
- On the Connections pane, expand the server node and click Application Pools to ensure that the Application Pool has a pool with ASP.NET version 4. If necessary, add a new Application Pool as shown below.
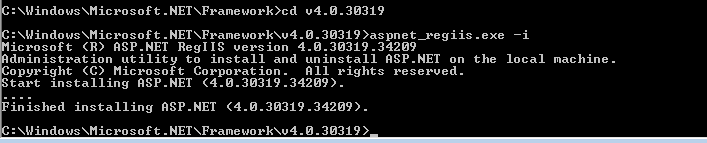
Please note it may be necessary to issue the following commands from the Administrator command prompt as shown below.
- Open a command line prompt.
- Enter "cd" following by the .NET Framework directory name, which is listed under the .NET Framework version drop-down list on the Add Application Pool window. For example, in the example above v4.0.30319 is displayed. Therefore, you would enter the following.
cd v4.0.30319
- Enter "aspnet_regiis.exe -i" as shown below.
aspnet_regiis.exe -i
- Close the command prompt.
The following shows a valid example of sub-steps a–c.
- In the Connections pane expand the Sites node.
- Right-click the site for which you want to create an application and click Add Application.
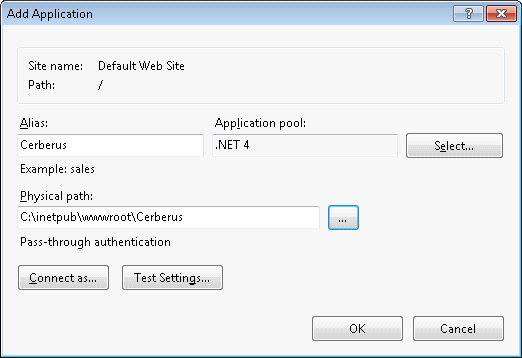
- Create a new web application called "Cerberus".
- Click OK.
- Download the Ceberus.zip file from Persephone Software, LLC. (Contact us at http://persephonesoft.com/contact for assistance.) This ZIP file comes with all the libraries built in; you do not need to install any additional components (besides IIS).
- Copy the contents of the archive to the newly-created folder.
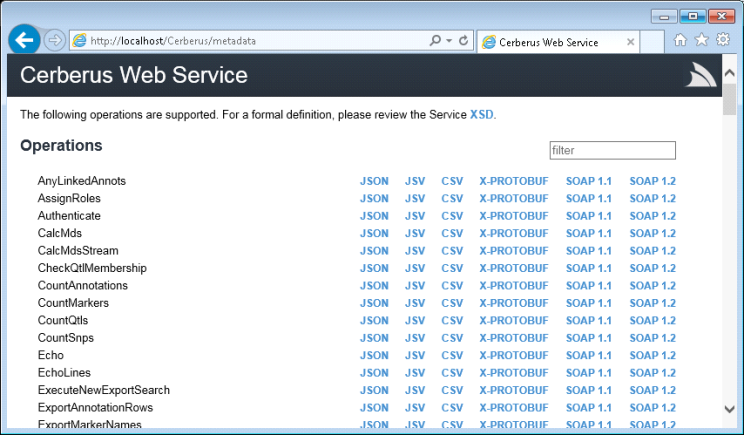
The server should work right away. Navigate to http://localhost/Cerberus to verify. You should see the list of API functions as shown below.
Step 3: Configure the Cerberus URL in the Persephone Configuration File
- Open the Persephone.exe.config file with MageUI.exe.
- Scroll down to the "<ApiServers>" section.
- Enter the URL of your Cerberus API server as shown in the example below. (Replace the text highlighted in yellow with actual data.)
<Server Name="Cerberus" Label="Cerberus" Url="http://myCerberusserver.com/Cerberus" />
Note
This command line can be modified to enable Windows authentication. Please see Configure Windows Authentication for more information.
- Save the Persephone.exe.config file.
Step 4: Configure the System and Default Database Connections in the Cerberus Configuration File
- Open the Web.config file on your Cerberus API server with a text editor.
- Scroll down to the "<connectionStrings>" section:
In case of Oracle:
<connectionStrings>
<clear />
<!-- Oracle database -->
<add name="Default" connectionString="xxxxxxxxxx" />
<add name="System" connectionString="xxxxxxxxxxx" />
</connectionStrings>
In case of MariaDb:
<connectionStrings>
<clear />
<!-- MariaDb database -->
<add name="Default" providerName="MySql.Data.MySqlClient" connectionString="xxxxxxxxxx" />
<add name="System" providerName="MySql.Data.MySqlClient" connectionString="xxxxxxxxxxx" />
</connectionStrings>
Important: the line <clear /> should be the first line in the list of connectionStrings.
- Enter the read-only database connection string as shown in the example below. (Replace the text highlighted in yellow with actual encrypted connection string.) This string is what tells Cerberus how to connect to your database and fetch the genomic data.
<add name="Default" connectionString="xxxxxxxxxx" />
- Enter the system connection string for your Cerberus server as shown in the example below. (Replace the text highlighted in yellow with actual encrypted connection string.) Please note that the connection will be used for logging performance, usage data and user's bookmarks. This connection must be writable on your Cerberus server; however, it does not need to be fast since the data will be written in the background without affecting the user experience. It is common to use the same connection string for Default and System connections.
<add name="System" connectionString="xxxxxxxxxxx" />
- Save the Web.config file.
Step 5: Configure the Log File Directory in the Persephone Configuration File
Follow the steps below to configure the log file directory in your Persephone configuration file.
- Open the Persephone.exe.config file with MageUI.exe.
- Scroll down to "log4net".
- Enter the path and file name of the log file as shown in the example below. (Replace the text highlighted in yellow with actual data.) Please note that this file must be writable by IIS.
<!-- Logging configuration: log to console as well as a rolling temp file -->
<log4net>
<appender name="Console" type="log4net.Appender.ConsoleAppender">
<layout type="log4net.Layout.PatternLayout">
<!-- Pattern to output the caller's file name and line number -->
<conversionPattern value="%date{yyyy-MM-dd HH:mm:ss} %5level [%thread] (%file:%line) - %message%newline" />
</layout>
</appender>
<appender name="RollingFile" type="log4net.Appender.RollingFileAppender">
<file value="log/persephone.log" />
<appendToFile value="true" />
<rollingStyle value="Date" />
<datePattern value="yyyyMMdd" />
<maxSizeRollBackups value="365" />
<layout type="log4net.Layout.PatternLayout">
<conversionPattern value="%date{yyyy-MM-dd HH:mm:ss} %5level [%thread] (%file:%line) - %message%newline" />
</layout>
</appender>
<root>
<level value="DEBUG" />
<appender-ref ref="Console" />
<appender-ref ref="RollingFile" />
</root>
</log4net>
Save the Persephone.exe.config file.
Configure the DNA Cache in the Persephone Configuration File
You can improve performance by following steps below to configure Persephone's DNA cache.
- Open the Persephone.exe.config file with MageUI.exe.
- Scroll down to "DnaCacheSettings Enabled".
- Enter your DNA cache settings in the format shown below. (Replace the text highlighted in yellow with actual data.) Please refer to the table below for definitions of these fields.
<DnaCacheSettings Enabled="True" CacheDirectory="{TEMP}\pers_dna_cache"
MaxSizeOnDiskMb="1024" ChunkFileSizeKb="1024" CompressionMode="DNABitsAuto" />
|
Field |
Definition |
|
Enabled |
Set this field to True to enable the DNA cache or False to disable it. |
|
CacheDirectory |
The name of the directory that will contain cached DNA sequences. Please note "{TEMP}" will be replaced automatically by the name of the current Windows Temp directory. |
|
MaxSizeOnDiskMb |
The maximum size of the cache files (in megabytes) used by Persephone. Please note higher values will use disk space more efficiently; however, it will also result in more data being downloaded. Also please note when the cache exceeds this size the oldest entries will be removed. |
|
ChunkFileSizeKb |
The Maximum size (in kilobytes) of a single sequence chunk of data. DNA sequences will be split up into chunks of roughly this size and users will download about this much DNA data on every request to the server. Please note higher values will use disk space more efficiently; however, it will also result in more data being downloaded. |
|
CompressionMode |
The compression method used in the DNA cache. |
- Save the Persephone.exe.config file.
Configure Windows Authentication
Important Note
If access to Persephone data is to be restricted to authorized users, then the Persephone client must be configured WITHOUT a database connection string. This ensures that all communication is going through Cerberus. Only Cerberus provides a mechanism to authenticate and authorize users.
- Open the Persephone.exe.config file with MageUI.exe.
- Scroll down to "<ApiServers>".
- Add UseWindowsAuthentication="true" to the Server Name command line as shown below. Failure to do so will prevent Windows authentication from operating correctly.
<Server Name="Cerberus" Label="Cerberus-API" Url="http://myCerberusserver.com/Cerberus" UseWindowsAuthentication="true" />
- Save the Persephone.exe.config file.
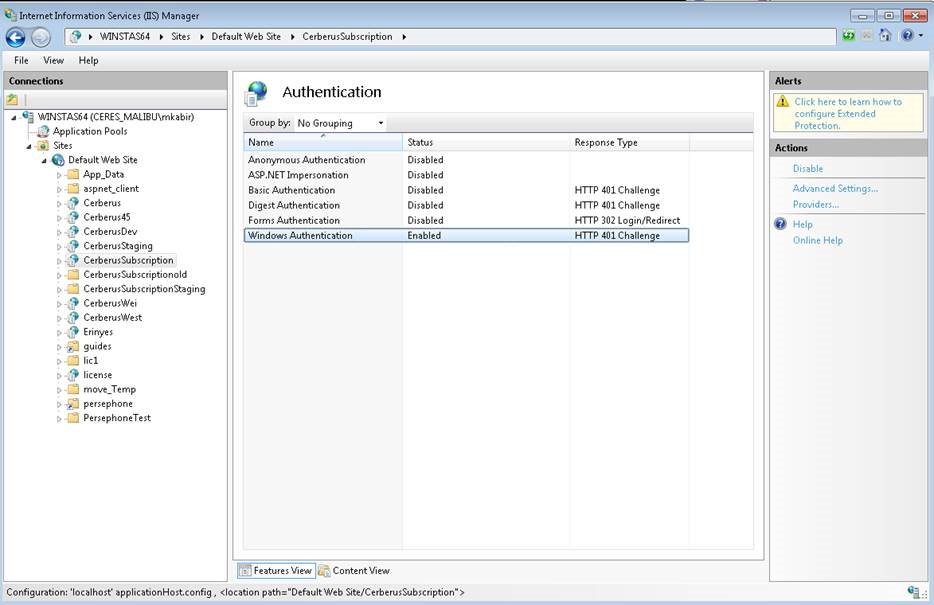
- Enable Windows authentication on your Cerberus server by opening the IIS Manager, selecting the Cerberus server, double-clicking Authentication, selecting Windows Authentication, and then clicking Enable on the Actions pane.
Note
See Microsoft's Configure Windows Authentication (IIS 7) page for more information.
Please make sure Anonymous Authentication is disabled and Windows Authentication is enabled as shown in the example below. Failure to do so will prevent Windows authentication from operating correctly.
- Open the Web.config file on your Cerberus API server with a text editor.
- Scroll down to the "<system.web>" section.
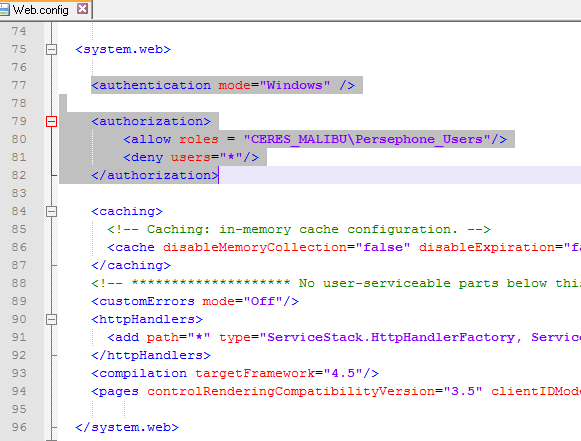
- Add the following text above "<caching>". (Replace the text highlighted in yellow with actual data.) In the example below "my-server" is your Cerberus server and "Persephone_Users" is a valid Active Directory (AD) group.
<authorization>
<allow roles = "my-server\Persephone_Users"/>
<deny users="*"/>
</authorization>
The following shows a valid example.
- Save the Web.config file.
Verify Windows Authentication
To verify that Cerberus is using Windows authentication, log in as a user which is part of an authorized AD group and enter the URL of the Cerberus server in a browser. A screen similar to the following will be displayed if Windows authentication has been enabled.

Verify Cerberus Server Connection
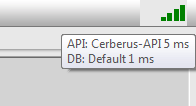
To verify that you are using the correct Cerberus API server open the Persephone application and then hover your mouse over the status bars in the upper right-hand corner as shown in the example below.
Alternatively, you can click Tools in the menu bar, select Settings, and then click the System tab to see the current Cerberus API server as shown in the example below.

 Copyright © 2009-2023 by Persephone Software. All Rights Reserved.