Set up Web Persephone Client
The web version of Persephone client will work with the same database as the one for the Windows Persephone application. You can consider it as another viewer to the same data loaded with PersephoneShell. While the functionality of the two genome browser applications differs to some extent, the web version is getting more and more features.
The installation of Web Persephone client is simple - unpack the archive with the server binaries, modify the configuration files to connect to proper database and the search engine and start the server.
In case of the web version, the main server application, called WebCerberus, will perform regular operations of a web server, so you do not need to have any other web server to serve the pages - WebCerberus will do it for you.
1. Unpack the archive with binaries to some directory
2. Prepare the connection string to the database.
The connection string itself is an encrypted string in EZconnect format: username/password@serverUrl:port/serviceName, for example, scott/tiger@persephonedb.company.com:3306/prod.
Encrypt this string using the program cipher supplied with PersephoneShell (as with all other programs, use Mono to launch).
mono cipher.exe -e -c scott/tiger@persephone.company.com:3306/prod
It will produce the encrypted connection string. With the switch -c, the result will be also copied to the clipboard.
3. Modify the file SelfHostingWebCerberus.exe.config
- Update the connection string:
<!-- Database connection strings; the "Default" key is required.
These connection strings must be encrypted using the same mechanism as in Persephone. -->
<connectionStrings>
<clear />
<add name="Default" providerName="MySql.Data.MySqlClient" connectionString="connection string here" />
<add name="System" providerName="MySql.Data.MySqlClient" connectionString="connection string here" />
</connectionStrings>
Replace the highlighted text with the text in the clipboard. Remember, the first connection (Default) is used for read operations, the second (System) is for writing into the database. Most of the time, these connections are the same, but they can be different if you are using read replicas.
- Find the section for Solr search index engine:
<!--
Search engine configuration.
ServerURL: Required. Full URL to the Solr server (without the Solr Core name),
i.e. http://localhost:8983/solr /openplants
CoreName: Required. The Solr Core name in the Solr server
i.e. persephone
To create a core, you can run "solr create -c desiredCoreName"
Enabled: If "false", search engine will be disabled, and all of the other parameters
will be ignored. Default is "false".
-->
<SolrSearchSettings Enabled="true" ServerUrl="http://localhost:8983/solr" CoreName="prod" />
Provide the name of the Solr core. See configuration of the Solr search index. You can reuse the same server as the one used for the Windows version.
- Adjust BLAST settings.
<!--
Configuration for the blast service.
Must contain NcbiBlast element, which have next structure:
MultipleSubjects: should be true for the blast service to work on Cerberus machine.
BlastDbFolder: the directory where the Blast database is located.
ProgramDirectory: the directory where blast binary is located.
TimeoutMinutes: Timeout for BLAST calls
TempDirectory: Directory for BLAST output files
MaxFileSize: Mas size of BLAST result file
-->
<BlastSettings>
<NcbiBlast MultipleSubjects="true" BlastDbFolder="/data/blast/prod" ProgramDirectory="/bin/blast" TimeoutMinutes="2" TempDirectory="{TEMP}" MaxFileSize="10000000" />
</BlastSettings>
- Configure the user disk settings
If you want the end users to upload their own data, provide information on the corresponding disk space and login options.
The user's disk quota is applied to the data that has been processed and stored on the server. For example, for the uploaded FASTA files the needed disk space is just 25% of the original size due to compression.
For a simple scenario, where all users have the same disk quotas (for example, 200 MB), use the following construct:
<UserSettings AnonymousLoginOnly="false" AllowAnonymousLogin="true" UsersDataDirectory="{PWD}/Users/" RequireRecaptcha="false" RecaptchaSecret="recapture secret here" QuotaMb="200" />
Here, you can control how much of the disk space you want to allow for all users. A separate page will describe advanced settings that allow using different disk quotas for different users.
- Configure the user login options
The users can log in using different mechanisms, such as email authentication or using OpenId.
<UserLoginOpenId Enabled="true" SuccessURL="http://localhost:1337/" SecureURL="http://localhost:1337/secure">
<Provider name="email" />
<Provider name="google" ButtonLabel="Sign in with Google" MetadataUrl="https://accounts.google.com/.well-known/openid-configuration" ClientId="SECRET.apps.googleusercontent.com" ClientSecret="CLIENT_SECRET" />
<Provider name="microsoft" ButtonLabel="Sign in with Microsoft" MetadataUrl="https://login.microsoftonline.com/common/v2.0/.well-known/openid-configuration" ClientId="CLIENT_ID" ClientSecret="CLIENT_SECRET" />
</UserLoginOpenId>
Based on which providers in the section above are enabled, the web application will display a choice for providing the login credentials:
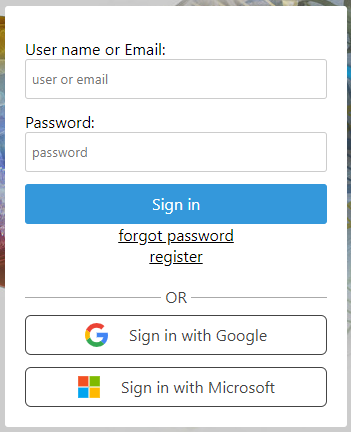
Using email authentication
Users can register using their email address. In the process of registration they will also provide their password. In communication with the users, Web Persephone will send emails to the registered address. In this case we need to configure the mail server settings. Here is an example using Gmail SMTP settings:
<MailSettings
MailFrom="address of Persephone support here"
SmtpServer="smtp.gmail.com"
SmtpPassword="encrypted password here"
SmtpUser="smtp user name here"
SmtpPort="587"
EnableSsl="true"
ConfirmationLinkTemplate="{0}#confirm-email/{1}"
PasswordResetLinkTemplate="{0}#confirm-password-reset/{1}"
EmailResetLinkTemplate="{0}#confirm-email-reset/{1}"
UserDeleteLinkTemplate="{0}#confirm-delete-user/{1}"
/>
Use cipher to encrypt the password, this is required.
In case of using Gmail as the mail server, a special password generated by Gmail will be needed. Register your device that will be contacting the service and use the generated password. More details are available here: https://www.lifewire.com/get-a-password-to-access-gmail-by-pop-imap-2-1171882
Add configset to Solr
If you plan to accommodate registered users who will upload their own data, you will need to add a special configset to Solr server, so that the uploaded data get indexed and is available for search.
Unpack the archive with the configset files to {PATH_TO_SOLR_SERVER}/server/solr/configsets/persephone.
This will create a sub-folder with path similar to /usr/bin/solr/server/solr/persephone/conf.
Running Web Persephone
Start the server the same way as the API-server for Windows:
mono SelfHostingWebCerberus.exe
This will run the server on port 1337 by default. If you want to change the port add a parameter on the command line. For example, if you want to change the port to 1338, run (note the closing slash):
mono SelfHostingWebCerberus.exe "http://*:1338/"
To start the web application, navigate to the URL pointing to the server in your browser. Make sure that this address is listed in the license for the application.
For example, http://localhost:1337 or to a domain assigned to the server's IP address: http://persephone.company.com:1337
See also Advanced configuration
 Copyright © 2009-2023 by Persephone Software. All Rights Reserved.