Web Persephone: Export map region
To export a region on a map, zoom in to the desired region; then, right-click a track, and select Export track region:
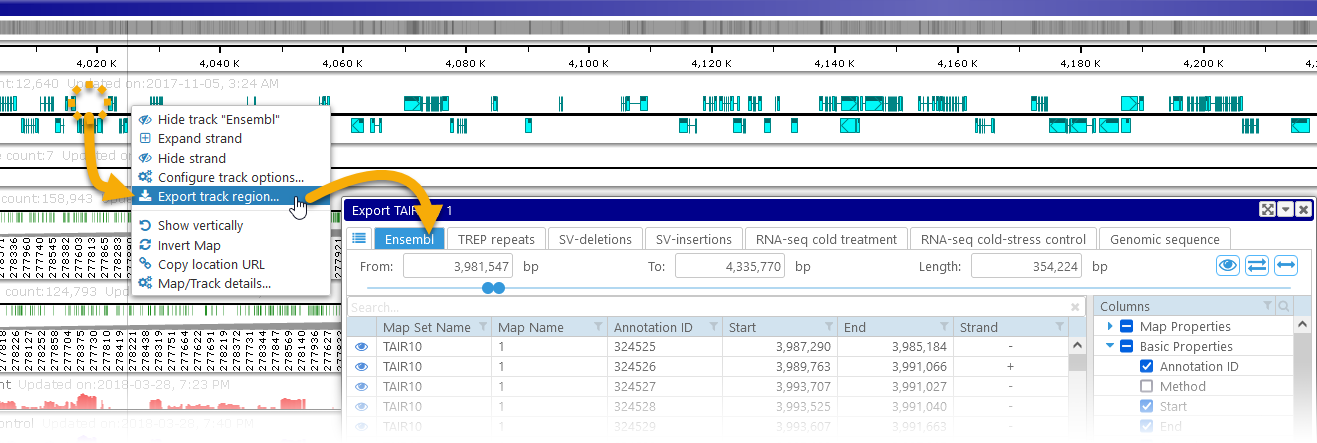
The Export dialog will open, and the track you right-clicked will be automatically selected. In addition to the common export options for the chosen track, the dialog displays a range selection toolbar at the top:
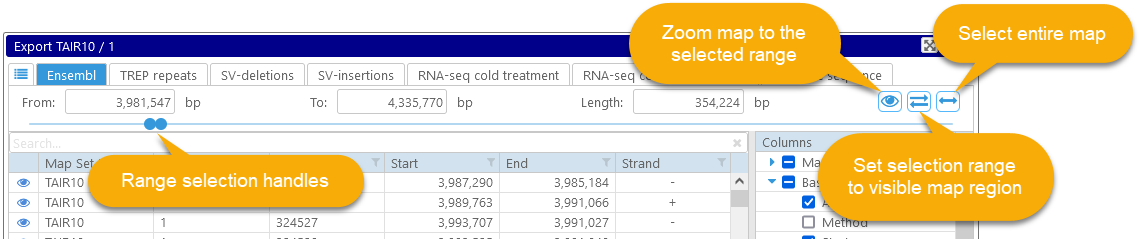
Drag the range selection handles (with the left mouse button) to quickly change the starting and ending position of the selected range. You can also enter an exact value in one of the textboxes at the top: From, To, and Length. For example, you could enter "1000000" into the Length textbox, and the To textbox (as well as the range sliders) will update to reflect the new range:

You can use the buttons in the upper-right corner to quickly synchronize your range between the Export dialog and the current map:
 Set the visible map region to the currently selected export range (by automatically zooming and panning the map),
 Set the export range to the currently visible map region,
 Select the entire map.
As you modify the selected export range, the preview table will automatically update with features (in this example, annotations) located inside this range on the map.
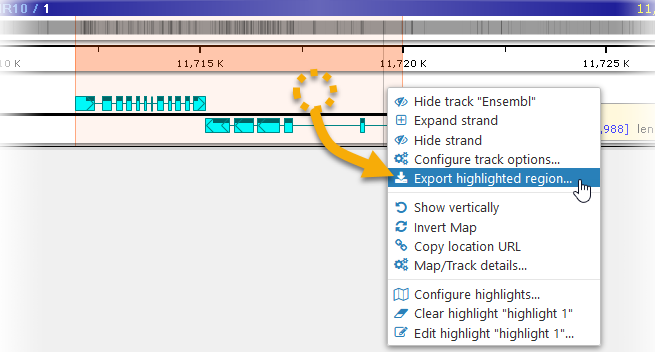
Exporting highlighted regions
If the track contains highlights, you can right-click inside a highlight, then select Export highlighted region to pref-fill the range selector with the highlighted region's coordinates:
 Copyright © 2009-2024 by Persephone Software. All Rights Reserved.