Web Persephone User Guide
The Application
Persephone is a tool for visualizing genomic information, enabling free exploration of large volumes of data -- including physical and genetic maps, genomic sequences, gene models, synteny, sequence variants (SNPs and indels), quantitative tracks such as RNA-seq and methylation, and many others. The application is designed to work with multiple maps on screen enabling users with ability to align and compare these maps.
Getting Help
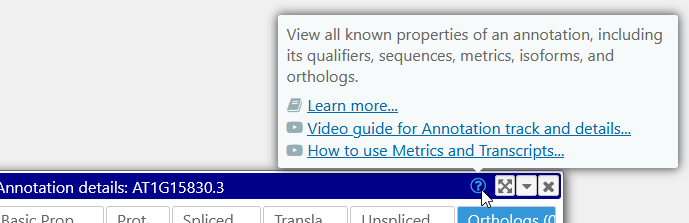
Many windows and other UI elements in Persephone contain  icons. Move the mouse over the icon to display a popup help balloon, which will contain links to in-depth tutorials and other documentation:
Opening Maps
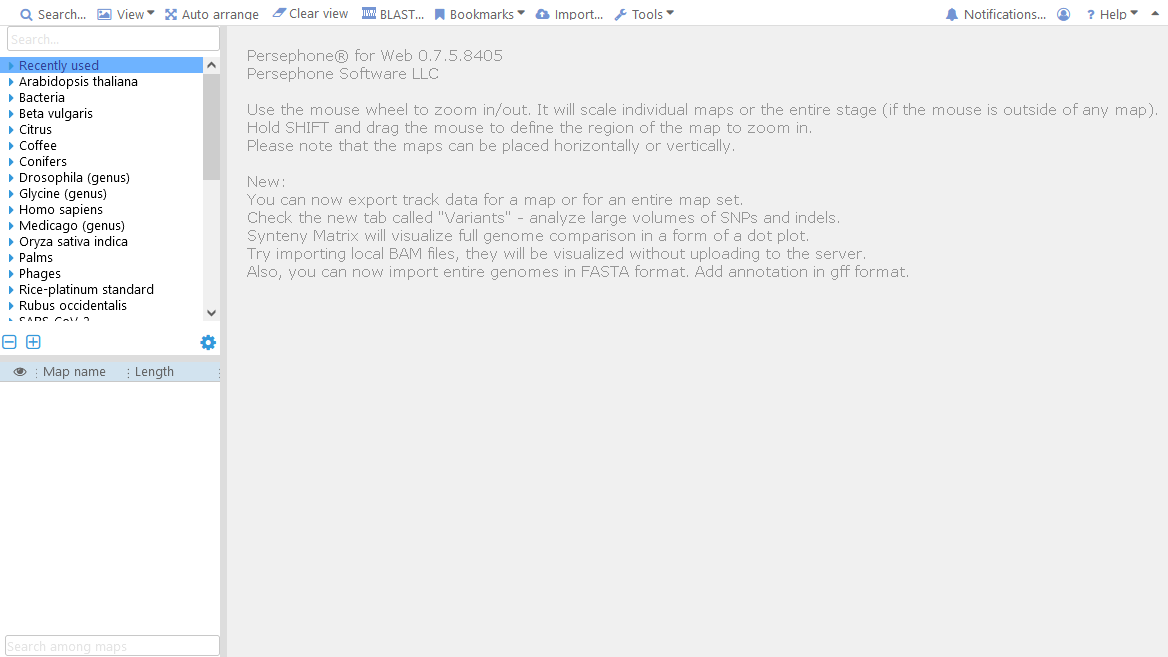
When you open Web Persephone for the first time, you will see the main screen:
The main tree control in the upper-left corner displays all genomes currently loaded into Persephone. Maps are organized into map sets; typically, each map set will represent a single version of a genome from a single source (such as NCBI). These map sets are further organized into the main map set tree, and typically grouped by organism. You can use the mouse wheel to quickly scroll through the tree, and click a tree node to expand it:
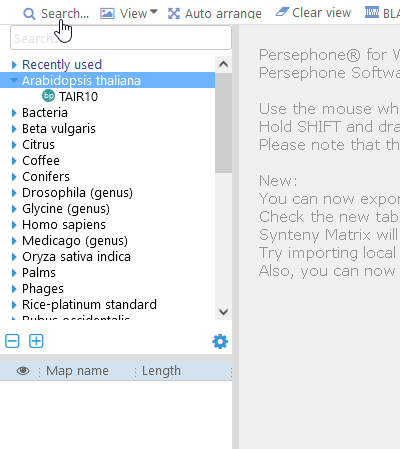
The node has a single map set inside it, TAIR10. The  icon next to the map set indicates that it contains physical maps, i.e. genomic sequences with coordinates measured in base pairs. Click the map set to list its maps in the grid in the bottom-left corner. If no maps have been opened yet, you will also see a visual overview of all the maps in the map set:
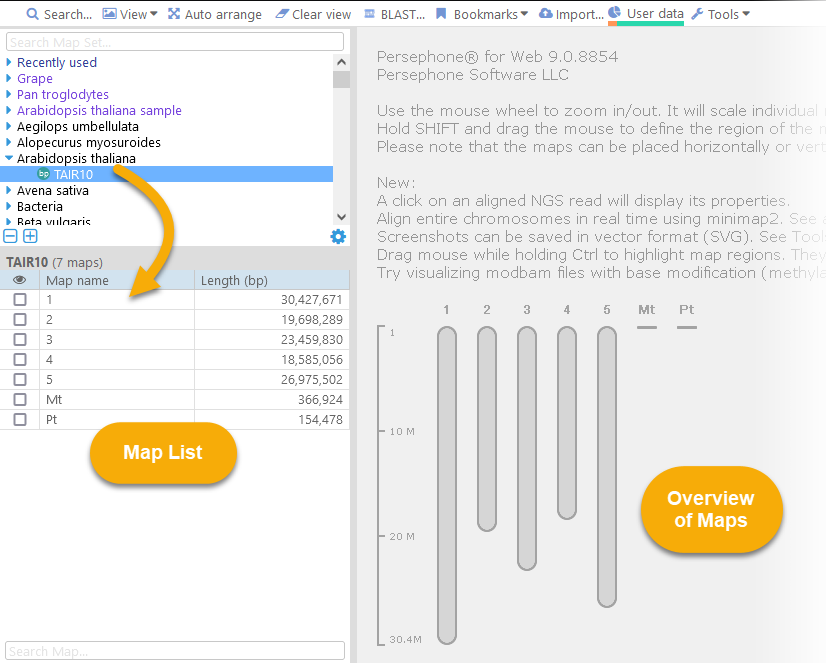
Then, click a map in the grid to open it on the main screen (you can click anywhere in the map's row, or on one of the maps in the overview):
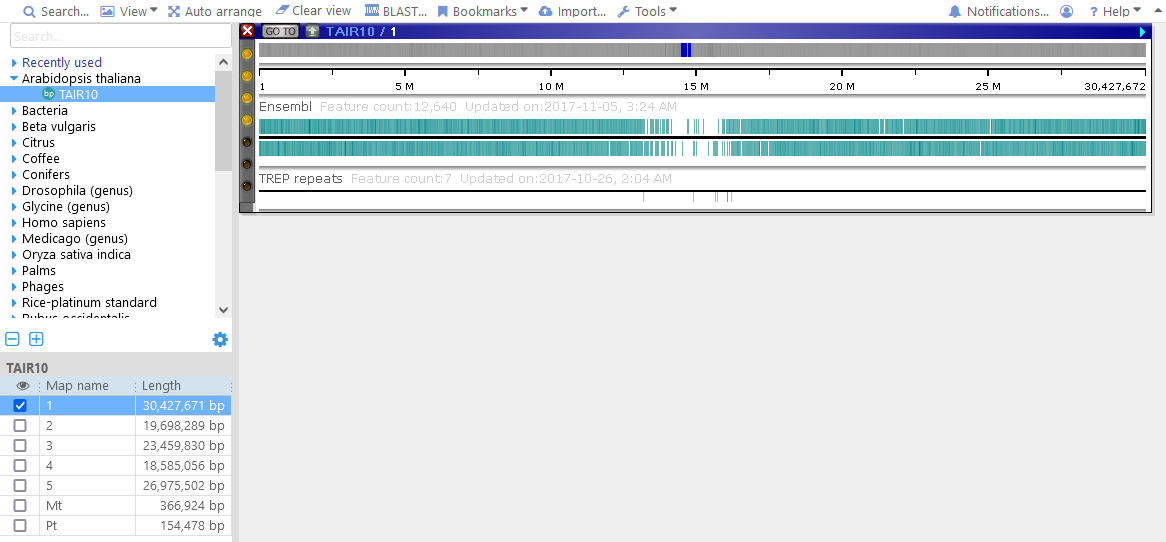
The map is initially shown in "bird's-eye"view, so that the entire chromosome fits on the screen. The main body of the map is occupied by its data tracks, while some useful controls are positioned on the edges. Click the map row in the grid again to dismiss it from the view.
Map Controls and Navigation
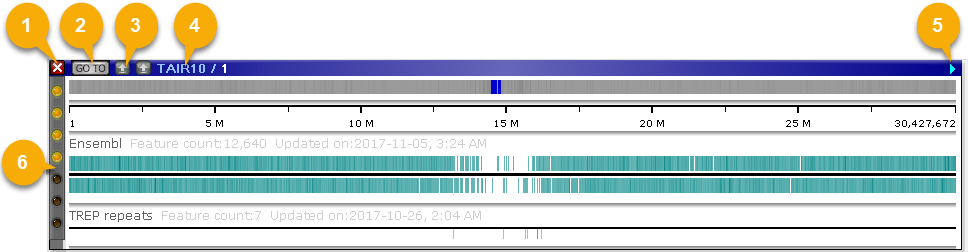
1: The Close button: Use this button to close the map. You can always re-open the map again from the map grid in the bottom-left corner of the screen.
2: The Go To button: Navigates to a precisely defined region of the map; this is useful when sharing map coordinates with colleagues.
3: The Sequence alignment buttons: When two maps are displayed side-by-side, performs instant alignment of their genomic sequences and displays the result as ribbons connecting the two maps.
4: The map title: Shows the name of the map set for this map (in this case, "TAIR10"), as well as the map's own name (in this case, "1").
5: The direction arrow: Shows the orientation of the map. Maps can be inverted if needed; this is useful when visualizing inversions in syntenic regions. An inverted map is indicated by a red, backward-facing arrow: 
6: The Track Panel: Controls the visibility and display style of tracks on the map; it is described in more detail here.
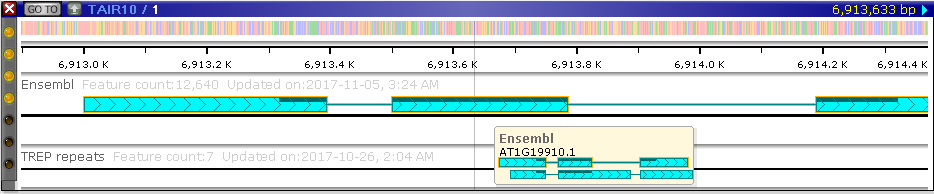
Every map in Persephone can contain a number of tracks; physical maps (such as this chromosome 1 of Arabidopsis) typically have a sequence track at the very top. In this bird's-eye view, most tracks can only display summary information; for example, the sequence track displays GC-content as a histogram. However, you can quickly zoom into the map to display a lot more detail. The quickest way to zoom a map is to position your mouse cursor over it, then roll the mouse wheel forward:
To zoom out again, roll the mouse wheel backward. If you're using a laptop trackpad instead of the mouse, you can place two fingers on the trackpad and move them up or down. You can also hold down the Shift key while rolling the mouse wheel to zoom by smaller, more precise increments. You can adjust the mouse wheel sensitivity in the Settings dialog.
If multiple maps are open in the main view, you can zoom all of them together by moving the mouse anywhere on an empty spot in the view, and rolling the mouse wheel (or using the trackpad gesture).
You can also drag the map with your mouse to scroll it. For more precise zooming, hold down the Shift key, hold down the left mouse button, and drag the mouse over the map. You will see a blue outline:
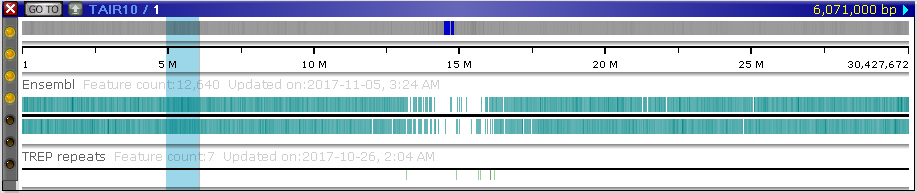
When you release the left mouse button, the map will zoom into the selected region. You can temporarily switch the mouse cursor into the selection mode by using the "long press" mouse gesture: hold the left mouse button pressed for about a second, then drag the mouse to define the zoom region.
To zoom in even more quickly, you can double-click any empty spot on the map. This way of zooming is less precise, but easiest to use -- and it will also work on older laptop trackpads that do not support the two-finger mouse wheel gesture.
To scroll or move the map, position the mouse over it, then drag with the left mouse button.
To return to the default bird's-eye view, click the "Auto arrange" button on the main toolbar:

By default, maps already on the screen will be auto-arranged whenever a new map is displayed. To prevent this from happening, deselect the "Auto arrange when new maps are opened" option in the Maps tab of the Settings dialog.
Map coordinates
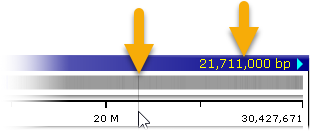
Physical maps are measured in bp; genetic maps are measured in cM. When you move the mouse over a map, you will see a "hairline" cursor, and the current position of the mouse will be displayed in the upper-right corner:
Linking to a map
To create a link to the currently displayed map, right-click anywhere on the map, then choose Copy location URL from the pop-up context menu:
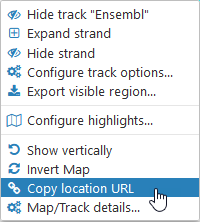
The URL to the currently displayed region on the map will be copied to the clipboard; you could then save it for later, bookmark it, or send it to a colleague. For example, the following URL will open the 1st chromosome of Arabidopsis and zoom in on a region:
https://web.persephonesoft.com/?data=genomes/TAIR10&loc=1:5876568..5924091
There are other ways of linking into Persephone; you can read about them here.
Rotating maps
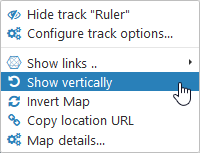
Maps are displayed horizontally by default, but can be rotated to display vertically. To rotate a map, right-click anywhere on the map, then choose Show vertically from the pop-up context menu:
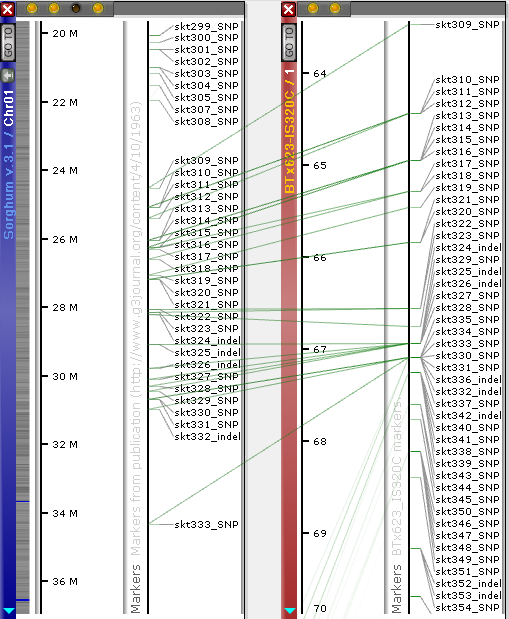
This option can be useful when displaying genetic maps alongside physical maps:

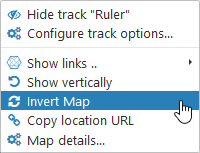
You can use the same context menu to invert the map:
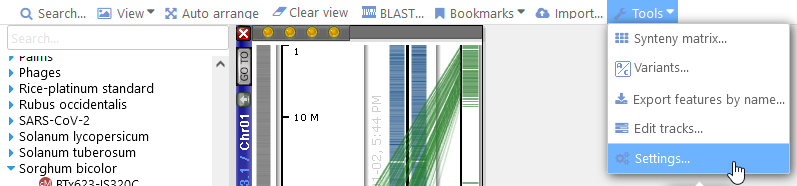
If needed, you can also toggle the default map orientation in Settings. First, select Tools | Settings from the main toolbar:
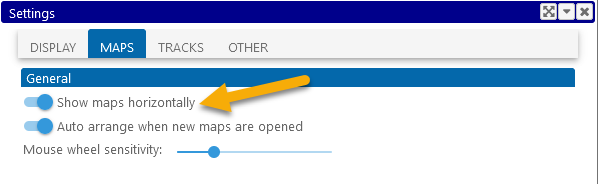
This will open the Settings dialog. In the dialog, click on the Maps tab, and toggle the Show maps horizontally option:
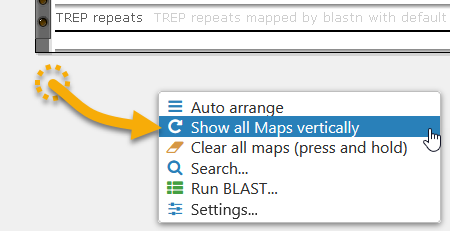
You can rotate all maps in the view simultaneously, by clicking anywhere on the backdrop (outside of any map), and selecting Show all maps vertically (or Show all maps horizontally, if the maps are already shown vertically). Note, this will be applied to the currently displayed maps only.
Clearing the view
To clear all maps from the view, move your mouse over the Clear view button in the main toolbar (or in the popup menu, as shown above); note that the button is highlighted with a gradient, instead of a "flat" color:

Hold down the left mouse button for about one second. The button will begin filling up with a darker blue color: 
When the button fills up completely, all maps will be cleared from the view; until then, you can release the mouse button to cancel.
Note
This method of clearing the view is also used in other places in Persephone, e.g. on the Variants screen. All buttons that must be clicked and held are identified by their blue gradient background.
Read on to learn about managing tracks, aligning connected map features, and other functionality.
 Copyright © 2009-2024 by Persephone Software. All Rights Reserved.