Using Advanced Filters
Many tabs and menus in Persephone allow creating advanced filters, which let you filter data to your needs. This section describes how to use this advanced filter editor.
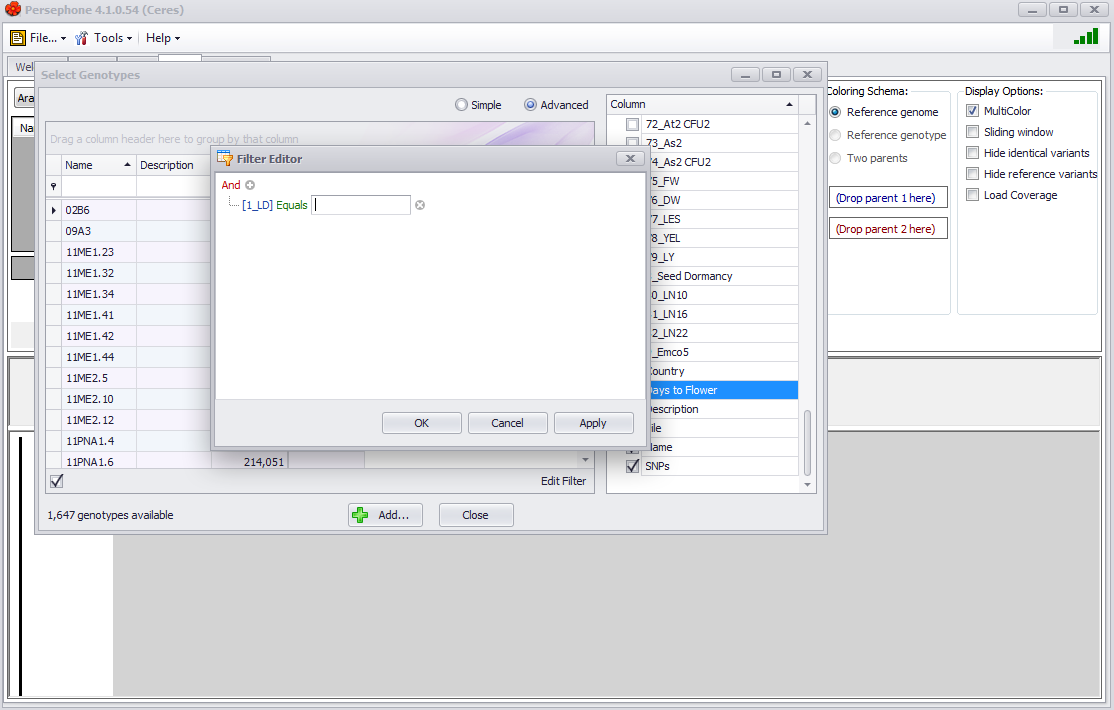
You can access the advanced filter editor by 1) clicking the Advanced radio button at the top of the window and 2) clicking the Edit Filter button displayed at the bottom right of the window in Advanced mode.
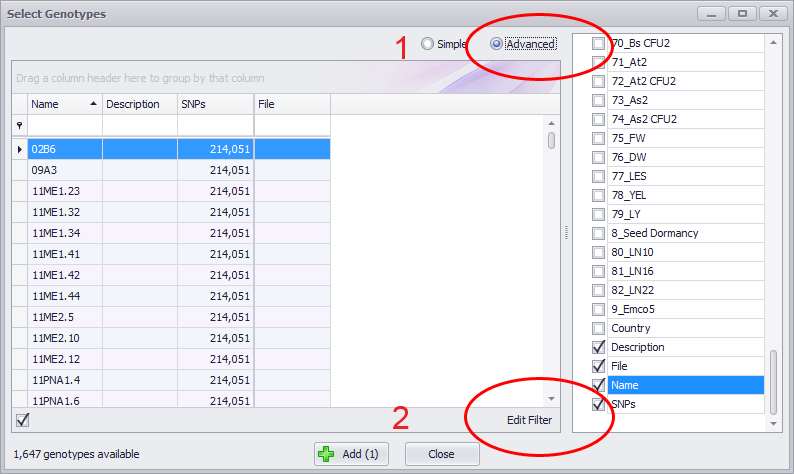
The initial Filter Editor will display only the And logical operator (see the figure below). If you click the small plus sign (+) button at the end of the line with And, additional parts of a filter will be displayed.
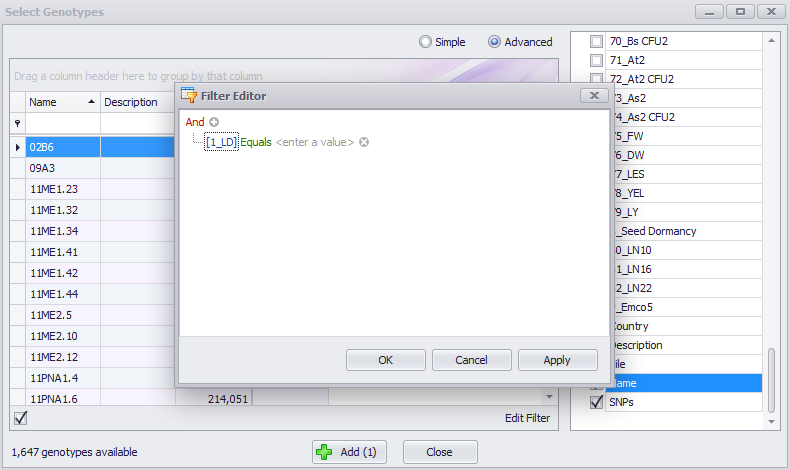
There are four components of the editor, which are described below:
- Logical Operator: The logical operator is displayed in red text and by default is an And operator. To modify the logical operator see Logical Operator for more information.
- Column Name: The column name is displayed in blue text and is the criterion the filter uses. (In the example above it's the phenotype [1_LD].) To modify the column name see Column Name for more information.
- Comparison Operator: The comparison operator is displayed in green text and is the method of comparison used by the filter. See Comparison Operator for more information.
- Value Box: If applicable, you can click the <enter a value> field to enter a value or values to use for the comparison operator. See Value Box for more information.
The small + will add an additional condition or value field and the small x will delete it. When an entry is finished you need to hit the Enter key on the keyboard. The OK button will apply the filter and close the Filter Editor window and the Apply button will apply the filter but not close the Filter Editor.
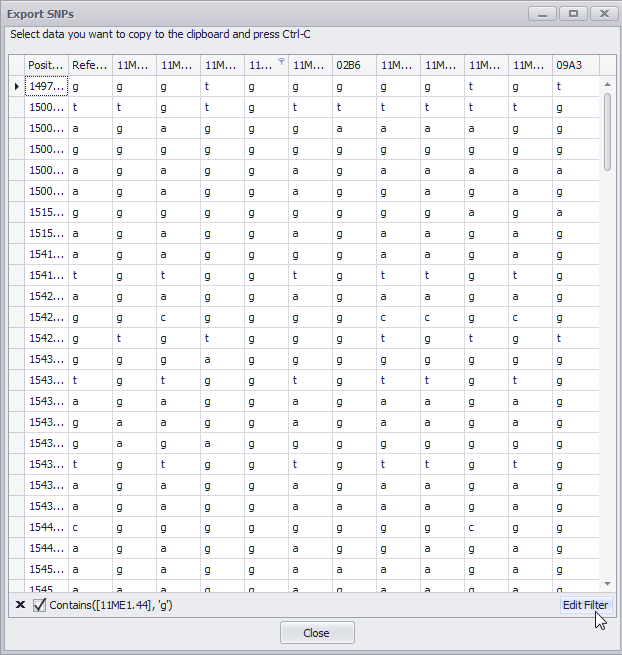
You can toggle the filter on and off by clicking and unclicking the checkbox at the bottom left of the window as shown below. Click the small x to delete the filter or click Filter Editor to edit the filter.
Logical Operator
When you click once on the logical operator (which is And by default) the menu below is displayed.
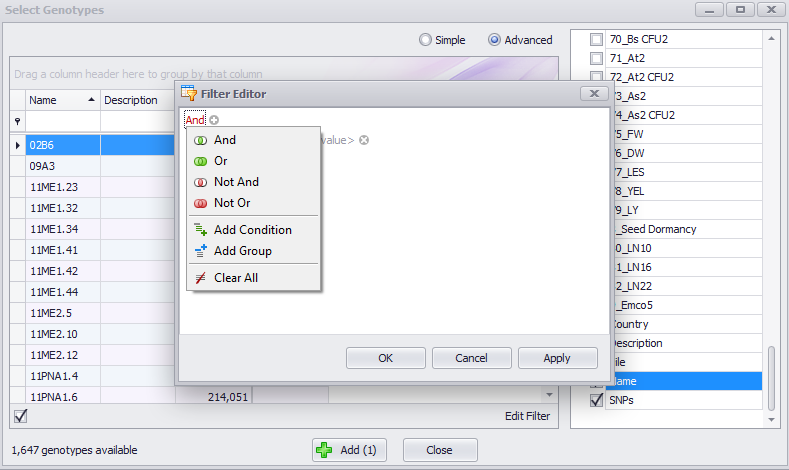
You can select a new logical operator in the top section of the menu, create a new condition or group in the middle section of the menu, or select Clear All to clear your selections.
Column Name
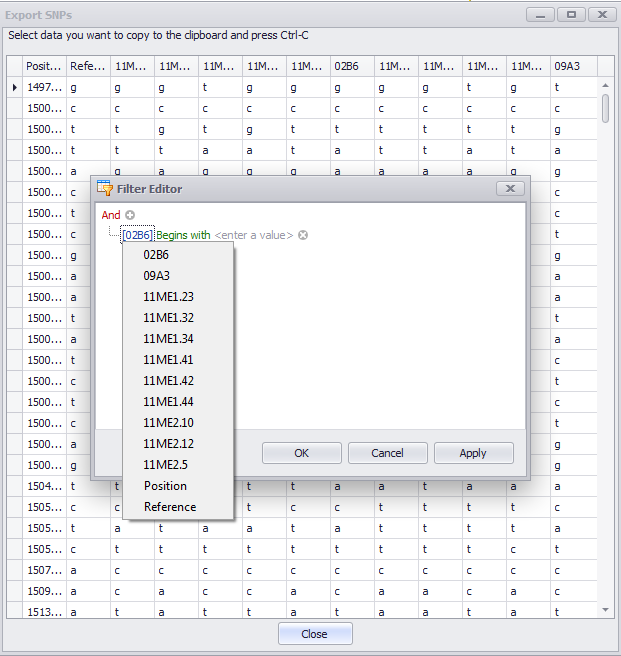
Click the column name (the text in blue) to change it as shown in the example below. For windows with a large number of columns you may need to click an up or down arrow to select the column you want.
Comparison Operator
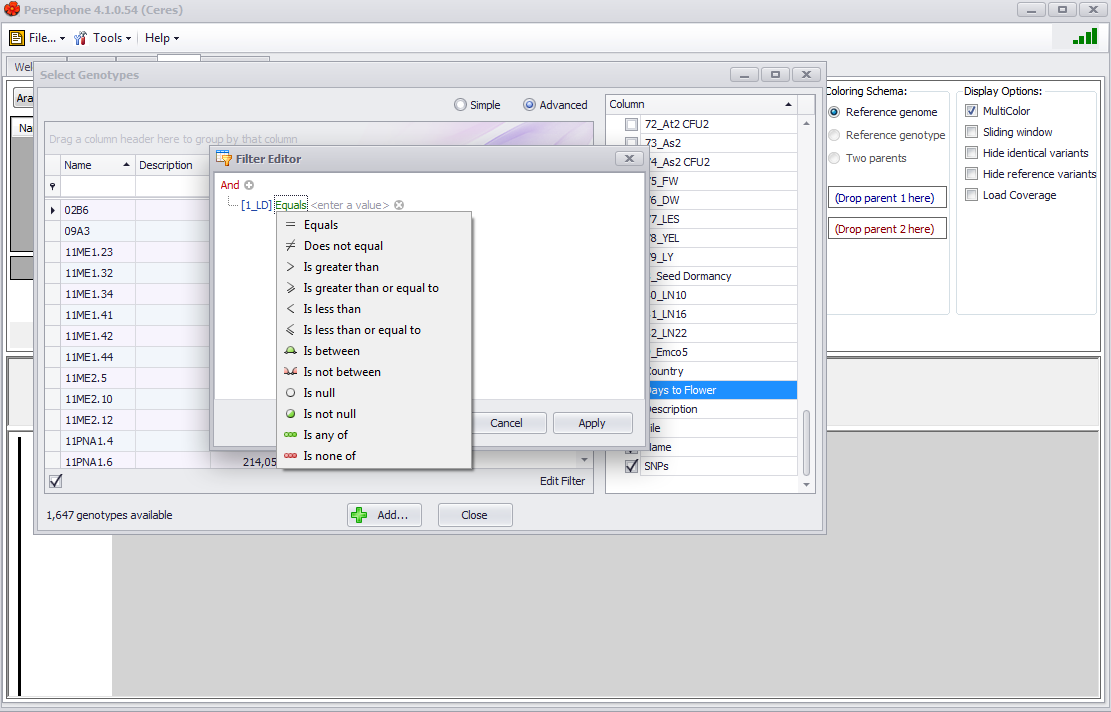
Click the comparison operator (the text in green) to select a variety of conditions for inclusion, exclusion, and comparison of data as shown below.
Value Box
The final entry — which may or may not be required — is the <enter a value> field. In some cases, where the previous part of the statement is, for example, "Is not null", no entry will be required. In some cases, you will need to enter more than one value, in which case after entry of the first value, hit the Enter key and a second <enter a value> field will be created.
