Web Persephone: DNA Motif Search
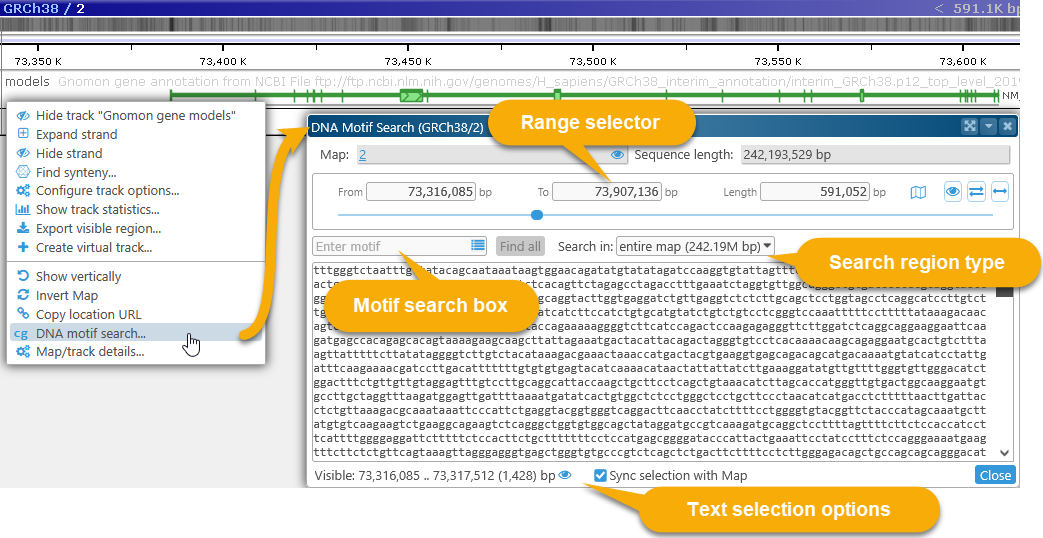
To highlight DNA motifs, right-click anywhere on a physical map, and select DNA motif search from the popup menu to open the DNA motif search dialog:
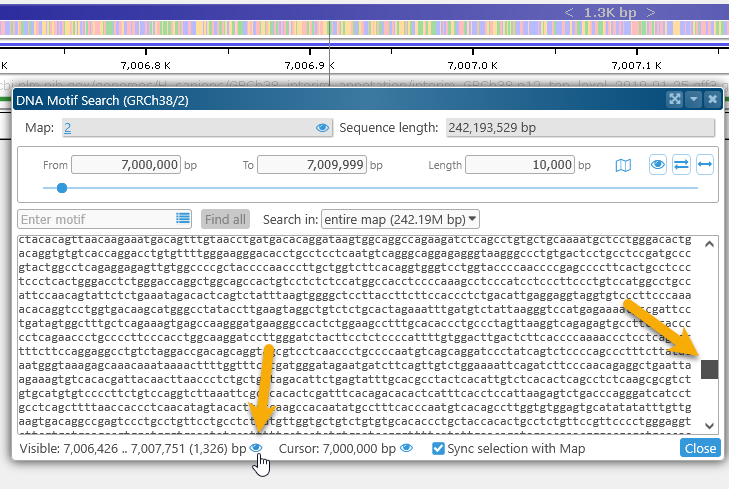
This dialog displays the DNA sequence of the currently visible map region. For now, the maximum allowed region length for motif search is 2Mbp; if the currently visible region on the map is longer than that, the range will be clipped to 2Mbp.
If you right-click inside a highlight and choose the DNA motif search (highlighted region) menu option, the highlighted region will be pre-selected in the DNA motif search dialog; but you can also adjust the selected map region manually (as described below).
You may also find it useful to dock the dialog to the bottom of the screen: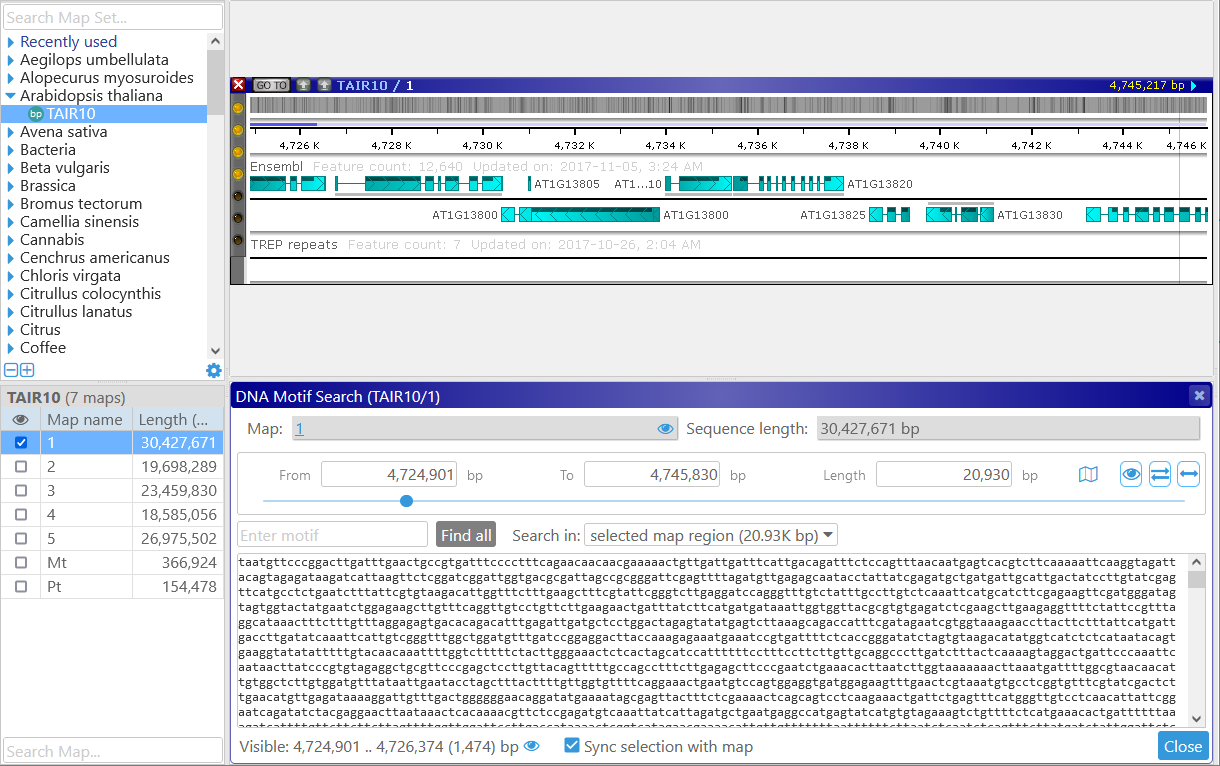
Selecting the sequence range
The Map region selector at the top of the dialog allows for fine-grained control of the search range; note that any highlights on the map are also highlighted in the sequence box:
The currently selected sequence range is also shown schematically on the map itself, right above the Ruler: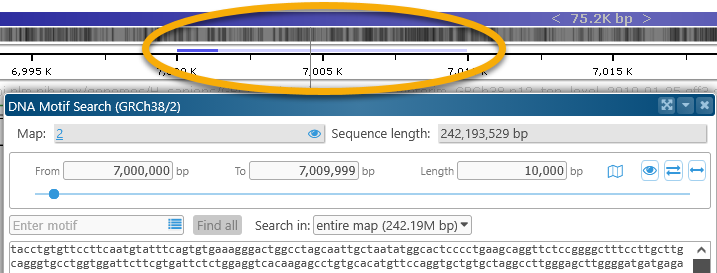
The solid blue line indicates the sequence fragment that is currently visible in the sequence box; the faint blue line indicates the entire selected region. Click the button at the bottom of the dialog to zoom the map to the currently visible sequence fragment. For example, you could scroll down in the box, and then zoom the map to the currently visible sequence fragment:
When you select text in the sequence box, this selection is automatically synchronized with the map:
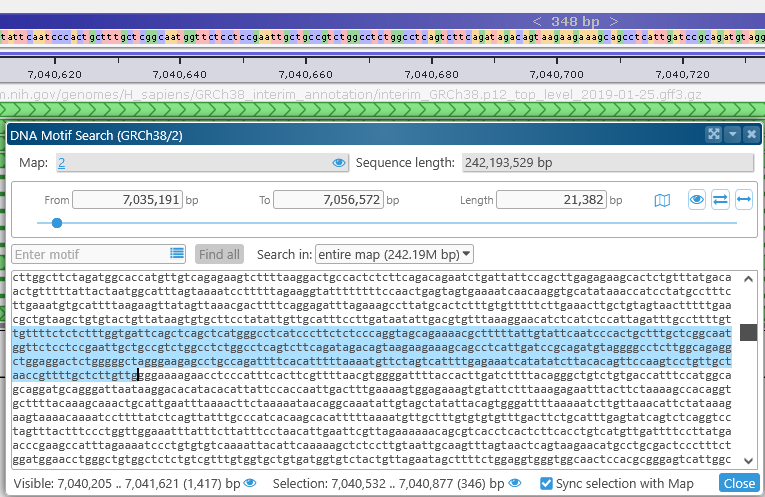
As you select text in the DNA textbox, the map zooms to your selection, and a temporary highlight is created to track the selected sequence. To disable this behavior, uncheck the Sync selection with map checkbox. You can still click the button next to the selection to zoom the map to it:

Searching for motifs
To search for a DNA motif, type it in the search box:
Instances of the motif that are found on the forward strand are immediately highlighted in green; those on the opposite strand in red; and overlaps in yellow. You can enter exact nucleotides, or wildcards:
- Standard IUPAC codes: match the relevant nucleotides. For example, "s" matches g or c; "n" matches any nucleotide.
- "stop" or "*": when entered by itself, matches the stop codons TAG, TAA, and TGA.
To search for multiple motifs, enter all of them into the search box, separated by commas:
To reveal all of the matches on the map, click the Find all button. By default, Persephone will only search for the motif in the currently selected region, as specified in the Search in dropdown box:

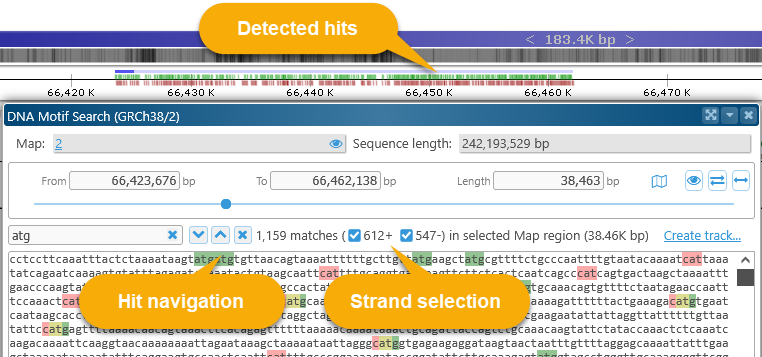
All of the matches are displayed in small sub-track above the Ruler; as usual, you can zoom in to the individual nucleotide level to examine the hits in more detail:
Use the hit navigation buttons to quickly jump between motif hits:
 Move to the next hit,
 Move to the previous hit,
 Clear the search.
The number of total hits, as well as the number of hits on each DNA strand, are displayed to the right of to the hit navigation buttons. You can toggle the strand checkboxes to show only the hits on a specific strand: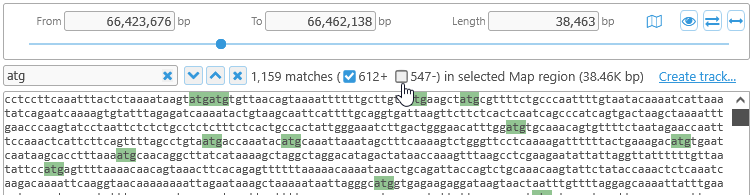
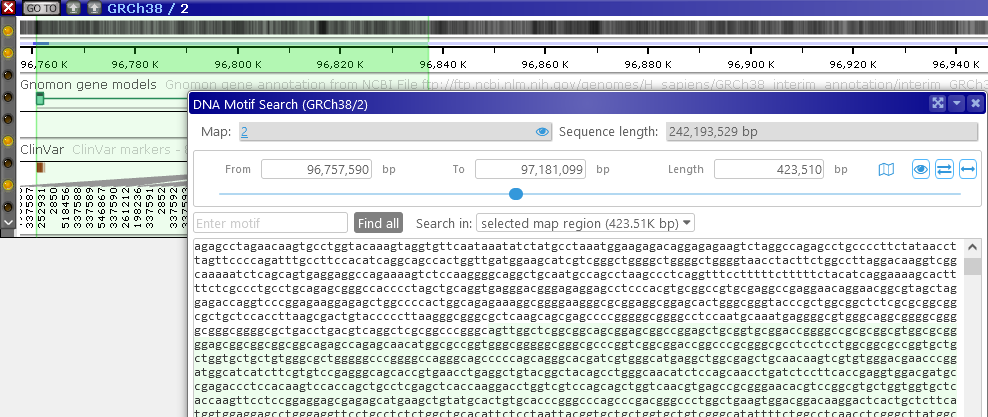
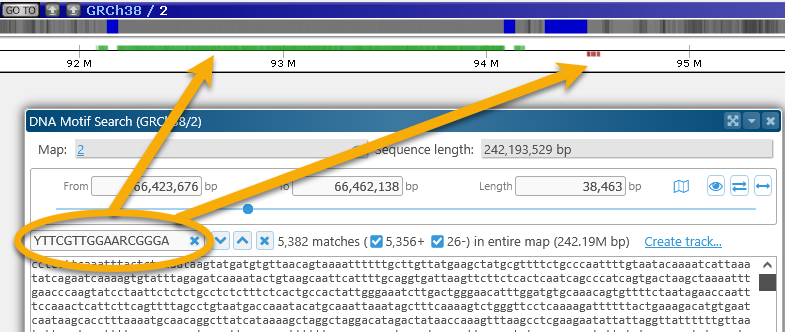
You can also change the Search in dropbox to entire map to find a motif of interest anywhere on the map, not just in the selected region (although doing so may take some time). For example, you can look for the centromere motif on the entire Human Chromosome 2:


Creating tracks
In addition to displaying the detected motifs on top of the ruler, you can display them in a temporary track. To do so, first click the Find all button to find the motifs (either in the currently selected region or on the entire map), then click the Create track link on the right-hand side:
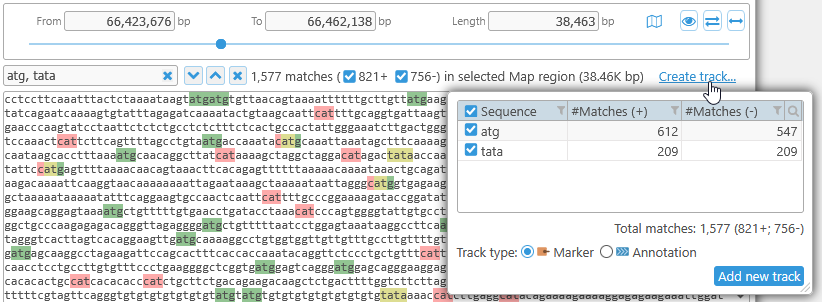
In the popup box, select the type of track you wish to create: Annotation (to display motif hits separately on each strand) or Marker (to display all the motifs together along with their labels). The Marker track type is selected by default: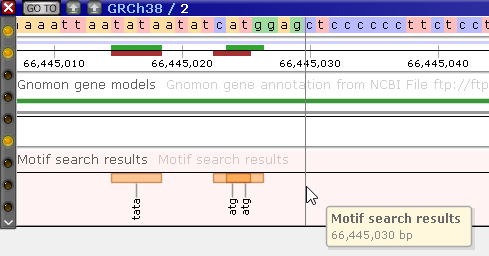
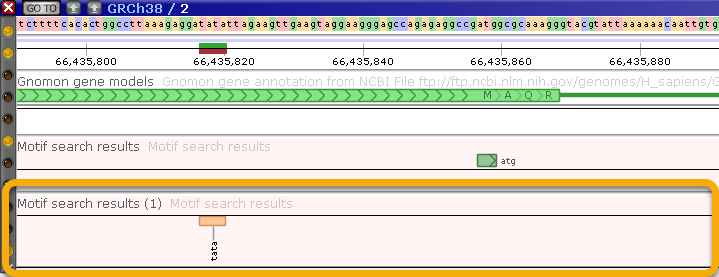
You can create multiple tracks, one track for each motif search. For example, you could first search for the "ATG" motif, and display it as an Annotation track...
...Then search for the "TATA" motif, and display it as a Marker track:
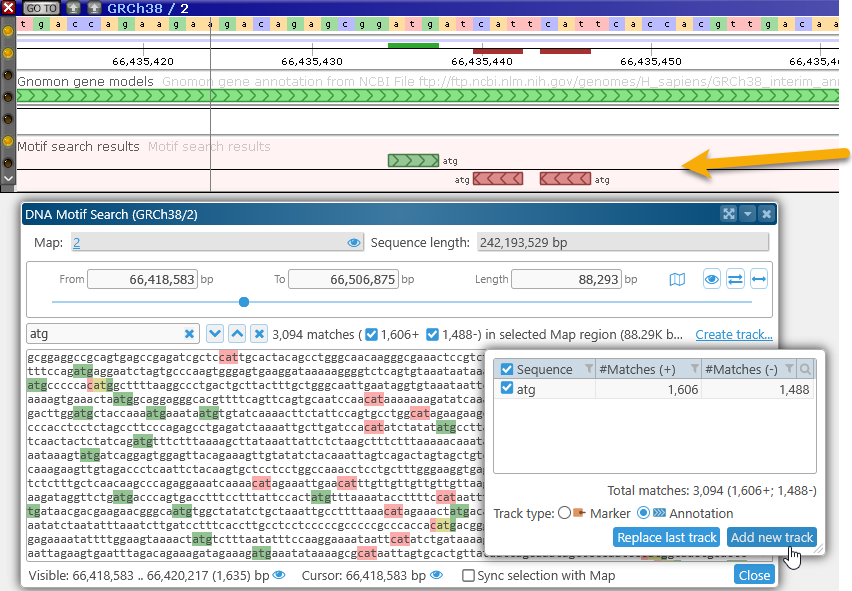
As usual, you can right-click the newly created tracks and choose Configure track options to customize them:
To delete one of these tracks, right-click it and select the Delete track option from the popup menu: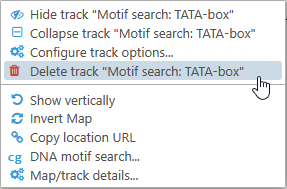
Searching for known restriction enzyme motifs
Instead of entering DNA motif searches by hand, you can select them from the list of known restriction sites from REBASE. To do so, click the  button in the search box to open the Known restriction enzymes table:
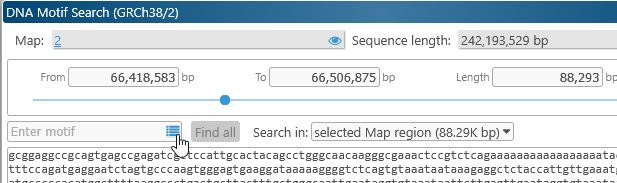
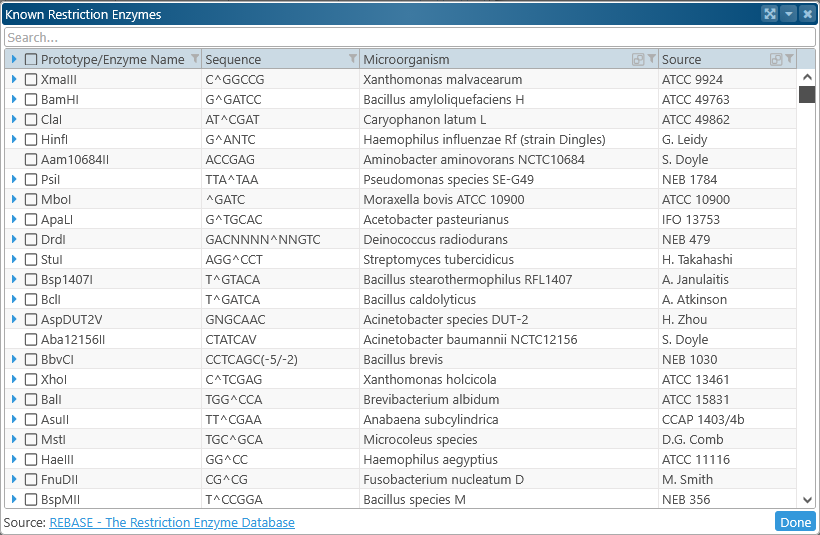
As usual, you can search and filter this table to quickly find the enzymes of interest. Click the  button next to the enzyme's node to expand it:
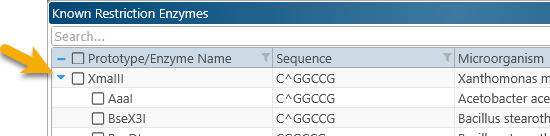
Select the motifs to search for by checking their checkboxes. As you do, the readout in the bottom-right corner updates with the number of selected motifs: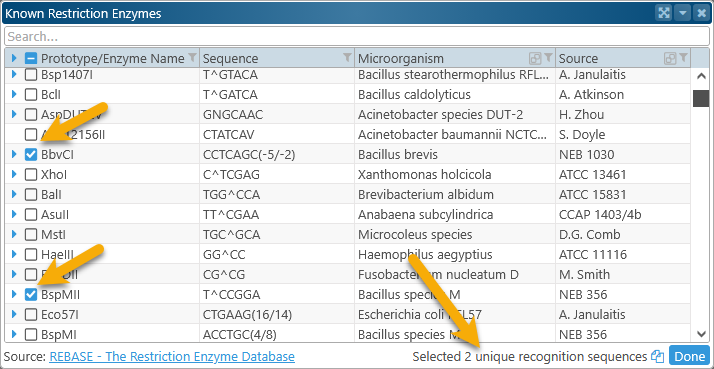
If needed, you can click the  button to copy the selected recognition sites to the clipboard. When you are ready, click Done to perform the motif search:
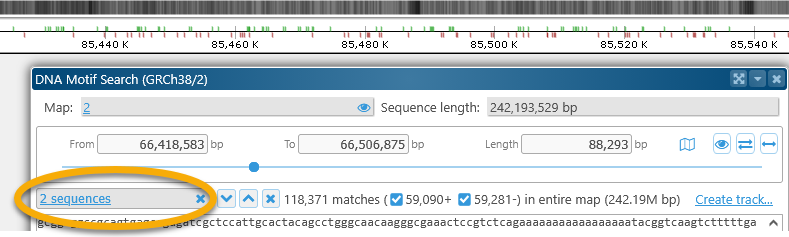
Click anywhere in the search box to bring back the Known restriction enzymes table (where you can choose a different set of motifs); or click the  button to clear the search (so that you can once again enter motifs by hand). As always, you can also display these motif hits in a custom track:
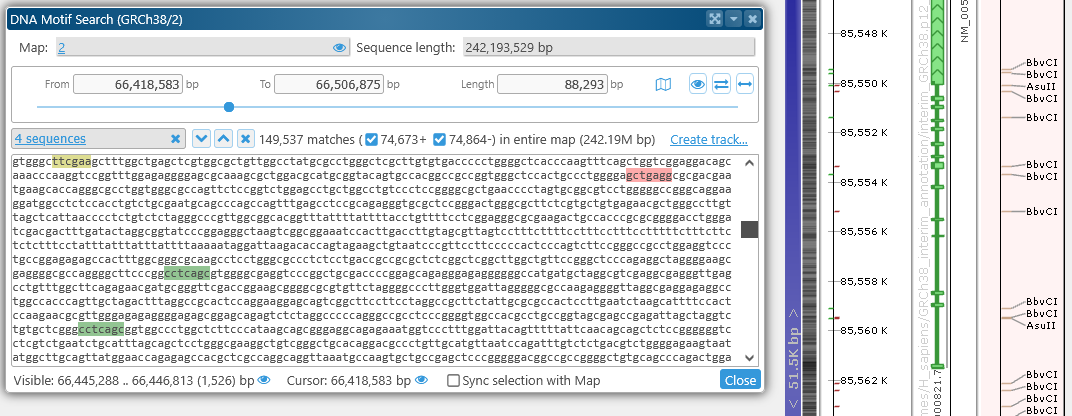
 Copyright © 2009-2025 by Persephone Software. All Rights Reserved.