Excersize: Installing MariaDb 10.8 under Windows
Here are step by step instructions on how to install MariaDb 10.8 on a Windows machine, add an empty database schema and create a user with the right permissions.
Download MariaDb 10.1.44 from https://downloads.mariadb.org/mariadb/10.8.3
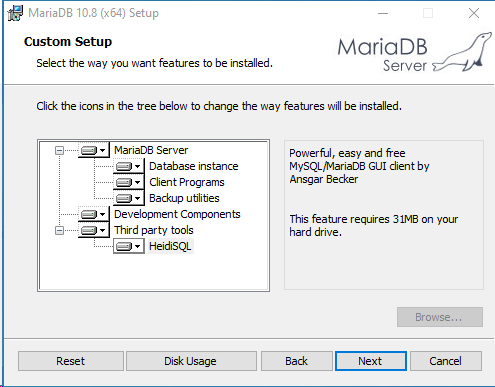
Run the installer.
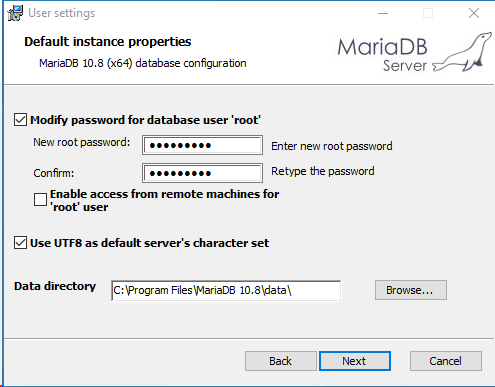
Notice the location of the data folder. You will need to edit the configuration in the file my.ini that will be created there.
Create a user 'root'. Make sure that "Use UTF8" check box is checked.
Change the configuration file my.ini found in the data folder, for example "c:\Program files\MariaDB 10.8\data\my.ini". Replace the highlighted text:
[mysqld]
datadir=C:/Program Files/MariaDB 10.8/data
port=3306
innodb_buffer_pool_size=1462M
character-set-server=utf8mb4
[client]
port=3306
plugin-dir=C:\Program Files\MariaDB 10.8/lib/plugin
with the following:
sql_mode = STRICT_TRANS_TABLES,NO_ENGINE_SUBSTITUTION,NO_AUTO_VALUE_ON_ZERO,ERROR_FOR_DIVISION_BY_ZERO,ONLY_FULL_GROUP_BY
# Strict settings for InnoDB/XtraDB engine
innodb_strict_mode = 1
default_storage_engine = innodb
# This setting makes table names case-insensitive
lower_case_table_names = 1
# utf8 seems to be most efficient for client-server communications
character_set_server = utf8mb4
collation_server = utf8mb4_bin
# setting default time zone to zero removes unnecessary time conversions between server and client
default_time_zone = "+00:00"
# READ-COMMITTED for high performance. NOTE: AWS uses 'tx_isolation' variable
transaction_isolation = READ-COMMITTED
# reduce requirements for creating triggers
log_bin_trust_function_creators=1
# Most important option, memory consumption is mainly controlled by this option
# Set it to at least 4GB for reasonable performance
innodb_buffer_pool_size = 4G
# Very good default settings, applicable to most workloads
key_buffer_size = 32M
innodb_log_file_size = 512M # Another good option is 256M to shorten recovery time (noticeable on Amazon RDS)
innodb_log_buffer_size = 16M
# Those settings are per-thread, so adjust them with care
tmp_table_size = 32M # 16M - 64M, default: 16M
max_heap_table_size = 32M # 16M - 64M, default: 16M
sort_buffer_size = 2M # 2M - 8M, default: 2M
join_buffer_size = 2M # 256K - 8M, default: 256K
# Table definition cache
table_definition_cache = 400 # default: 400
table_open_cache = 2000 # default: 2000
# Turn off query cache
query_cache_type = 0
query_cache_size = 0
# Limits
max_allowed_packet = 64M # default: 16M
max_connections = 500
open_files_limit = 16384
# .Net Timeout
net_write_timeout = 3600
net_read_timeout = 3600
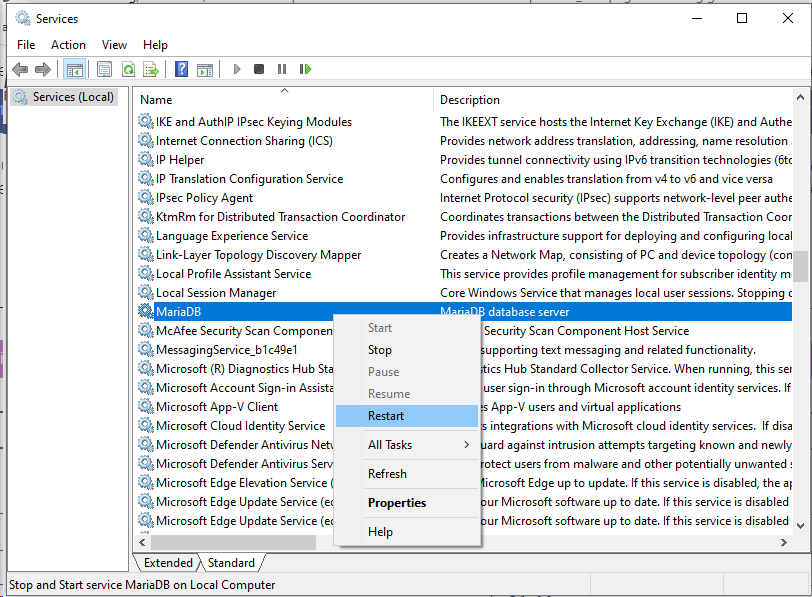
Run "Services" and restart service called MariaDb, so that it starts using the updated configuration values.
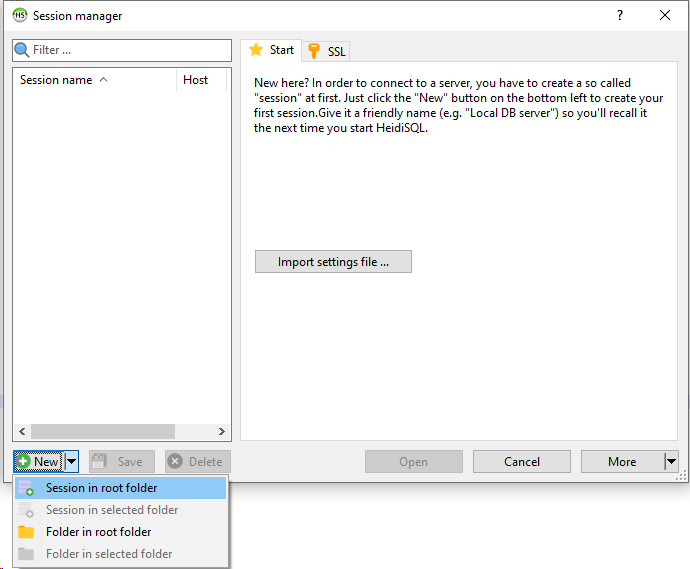
Start HeidiSQL that was installed together with MariaDB. Create a new session, you can call it 'root-session':
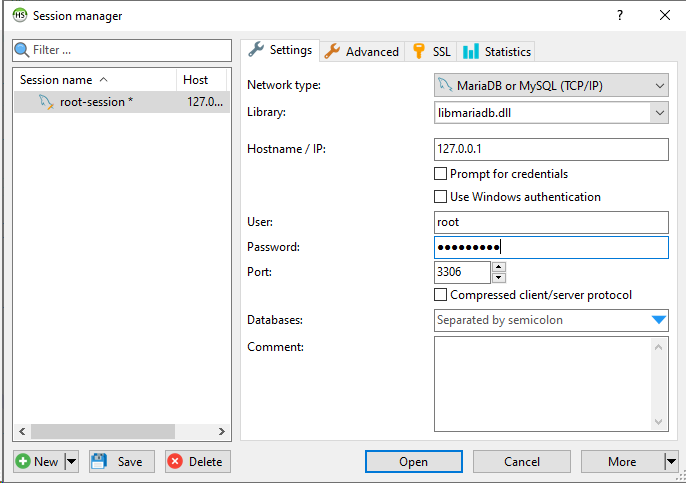
Provide the same password that was set during installation of MariaDb.
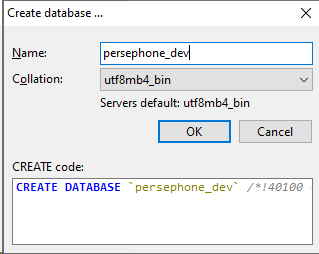
Open the newly created session. Now, it is time to create an empty database schema that will later be populated by PersephoneShell with the command 'init'.
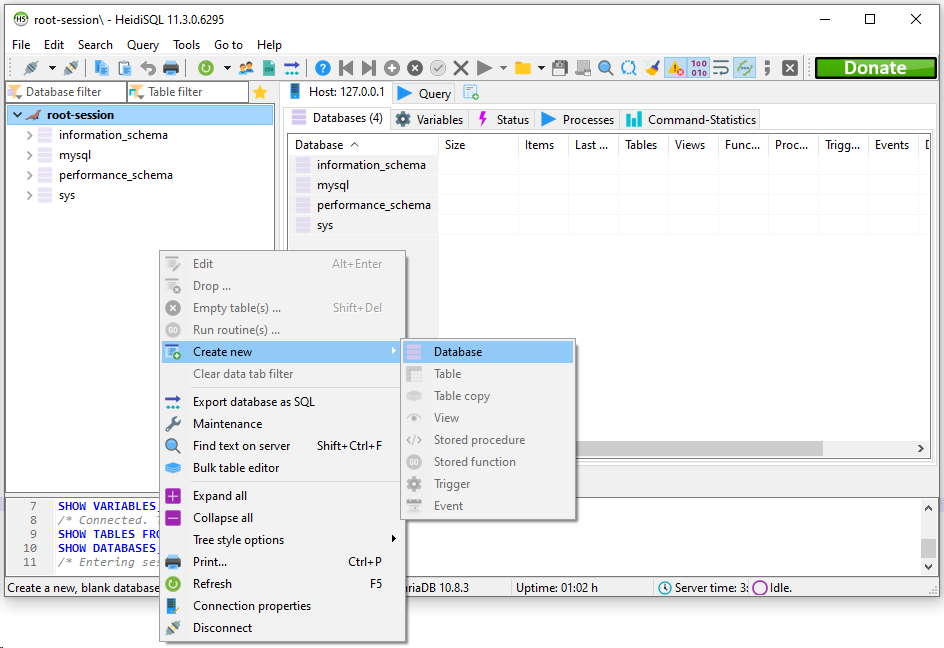
Let's call the database persephone_dev.
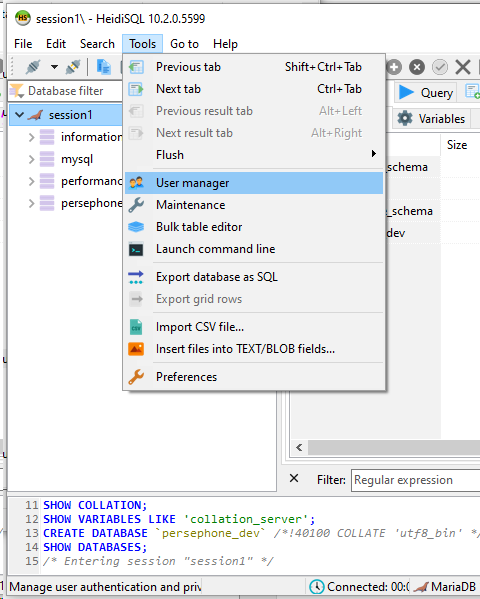
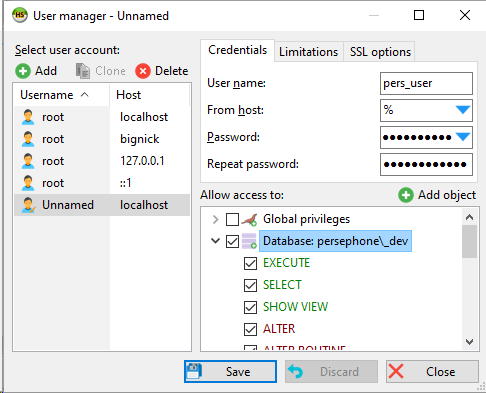
Next step is to create a user.
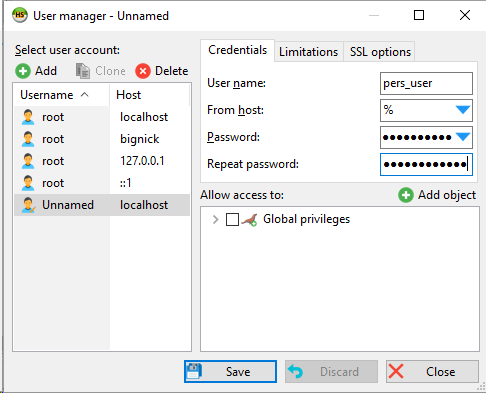
Save. Click "Add object" that will be associated with our database persephone_dev.
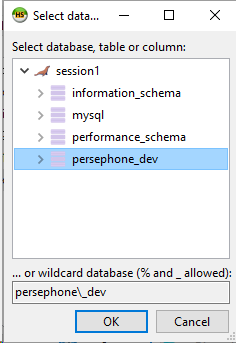
This will allow you to give permissions to the user to have full control over the newly created database:
At this point, you can close HeidiSQL.
Your database is ready to be populated by PersephoneShell that will run its initialization script.
 Copyright © 2009-2024 by Persephone Software. All Rights Reserved.