Get Marker Details for a List
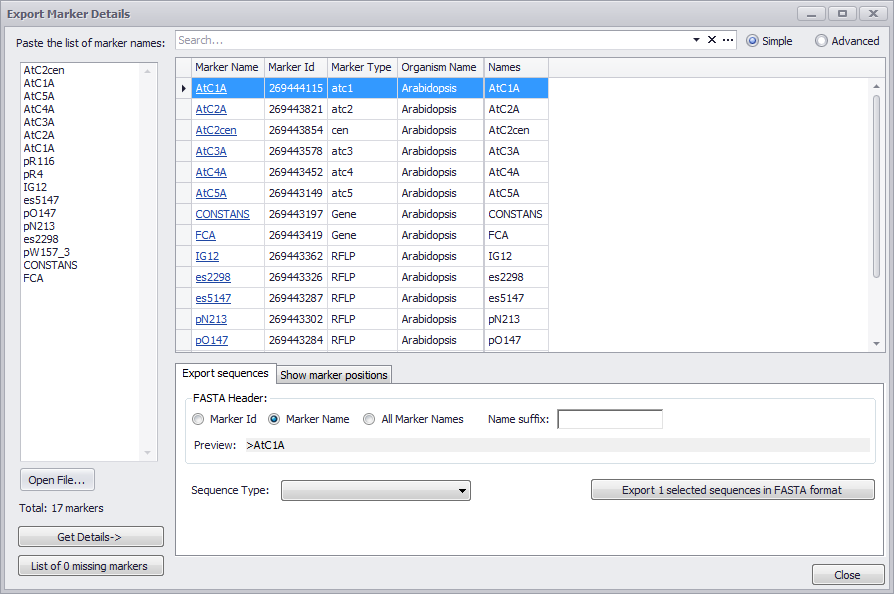
This menu selection provides information on one or more markers. In the Export Marker Details window you can either enter marker names manually in the leftmost box or use the Open File button to open a file with a list of marker names (one per line in either case). Clicking the Get Details button will produce a listing of markers on the main screen with associated information. Any markers not found can be recovered by pressing the List of Missing Markers button.

The search box at the top of the form can be used to filter the results if the Simple radio button is clicked (the default state). The Advanced radio button enables more sophisticated filtering options. See Advanced Marker Export for more information.
The panel at the bottom of the window contains two tabs: Export sequence and Show marker positions. If sequences are present in the database, you can export marker sequences in FASTA format. The description line can be the Marker ID, Marker name, or All Marker names. You can preview the file by entering the sequence in the Preview field. You must enter the Sequence Type using the drop-down menu and then you can export the FASTA file using the Export selected sequences in FASTA format button.
The Show marker positions tab enables you to display the locations of markers present in more than one map or map sets and/or in multiple locations in a single map. You can search for and specify a map set and then the Map Name and length of the marker position will be displayed.
Advanced Marker Export
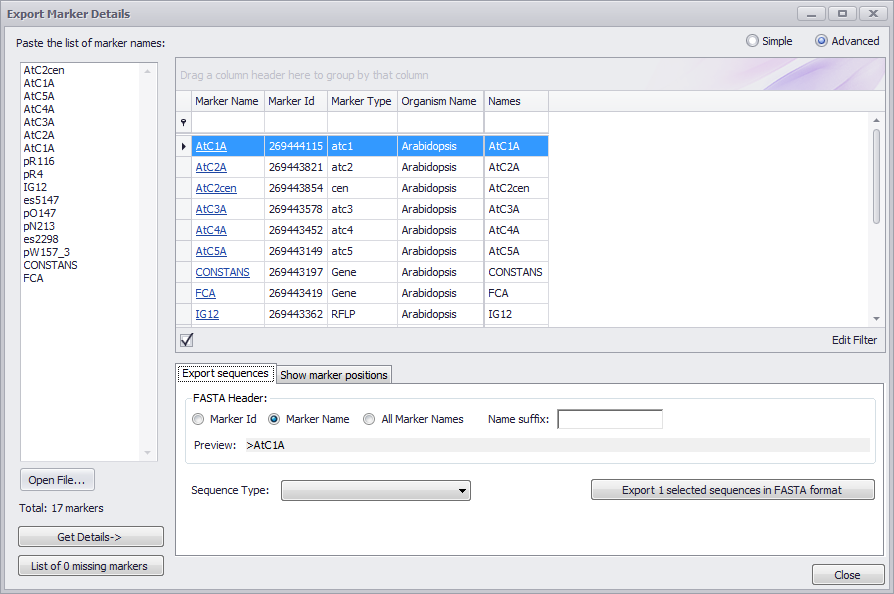
If you click the Advanced radio button (see the figure below), the entry field for the Simple search mode is hidden. A column-specific filter entry field is displayed directly under each column field name. If you enter text in a column filter, only rows with matches to the entries in the filter columns will be displayed. Columns can still be sorted by clicking on the column name. You can group samples by clicking on a column name and dragging it into the box above the column names row.

Dragging multiple column names into the box will create hierarchical groupings. The hierarchy is established by the order in which the column names are dragged into the box with the first column name at the highest level of the hierarchy. Dragging the column names to the left (higher level) or right (lower level) in the hierarchy graphic will raise or lower the column name in the hierarchy. You can also remove a column name from the hierarchy clicking on it and dragging it back to the column name row.
An Edit Filter button is displayed at the bottom right of the window above the Close button in Advanced mode. This will enable you to create more complex filters when needed. It can be used in conjunction with the options previously mentioned for Advanced filtering. If you click the Edit Filter button, the Filter Editor window will be displayed. See Using Advanced Filters for more information.
