Web Persephone: An example of editing a gene annotation
Follow this step-by-step example to learn about editing gene annotations in Persephone. To learn more, click here for the full guide to this functionality.
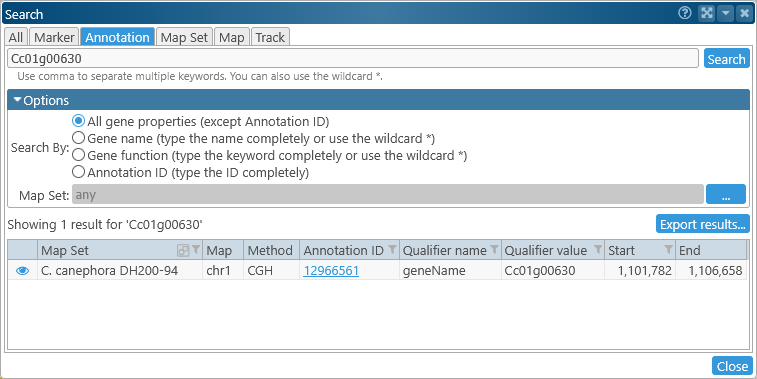
1: Find and examine the annotation
Take a look at the gene annotation "Cc01g00630" on Coffea canephora, chromosome 1. To find it, you can use Persephone's Search feature:
Alternatively, you can click one of the following links:
- Direct link to the gene annotation: https://web.persephonesoft.com/?searchAnnot=Cc01g00630
- Link to the map region where the annotation resides: https://web.persephonesoft.com/?data=genomes/NCBI_GCA_900059795.1&loc=chr1:1100039..1112677
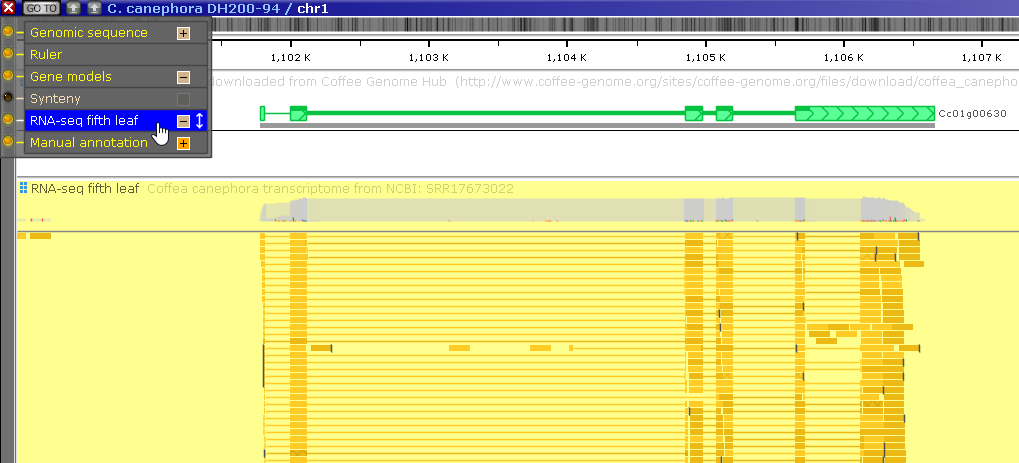
There is only a single gene transcript for this gene on its Annotation track:
But this map also contains a BAM track with RNA-Seq reads; let's turn it on (assuming it wasn't turned on already):
Note that many of the BAM reads support the existence of an intron in the gene's 3' UTR, which is absent from the gene model: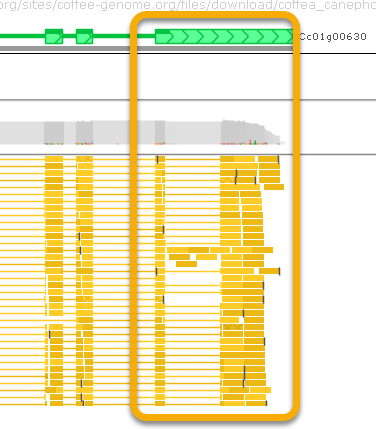
2: Edit the gene model
Right-click the gene annotation's glyph, and select Edit gene model to bring up the Edit gene model dialog: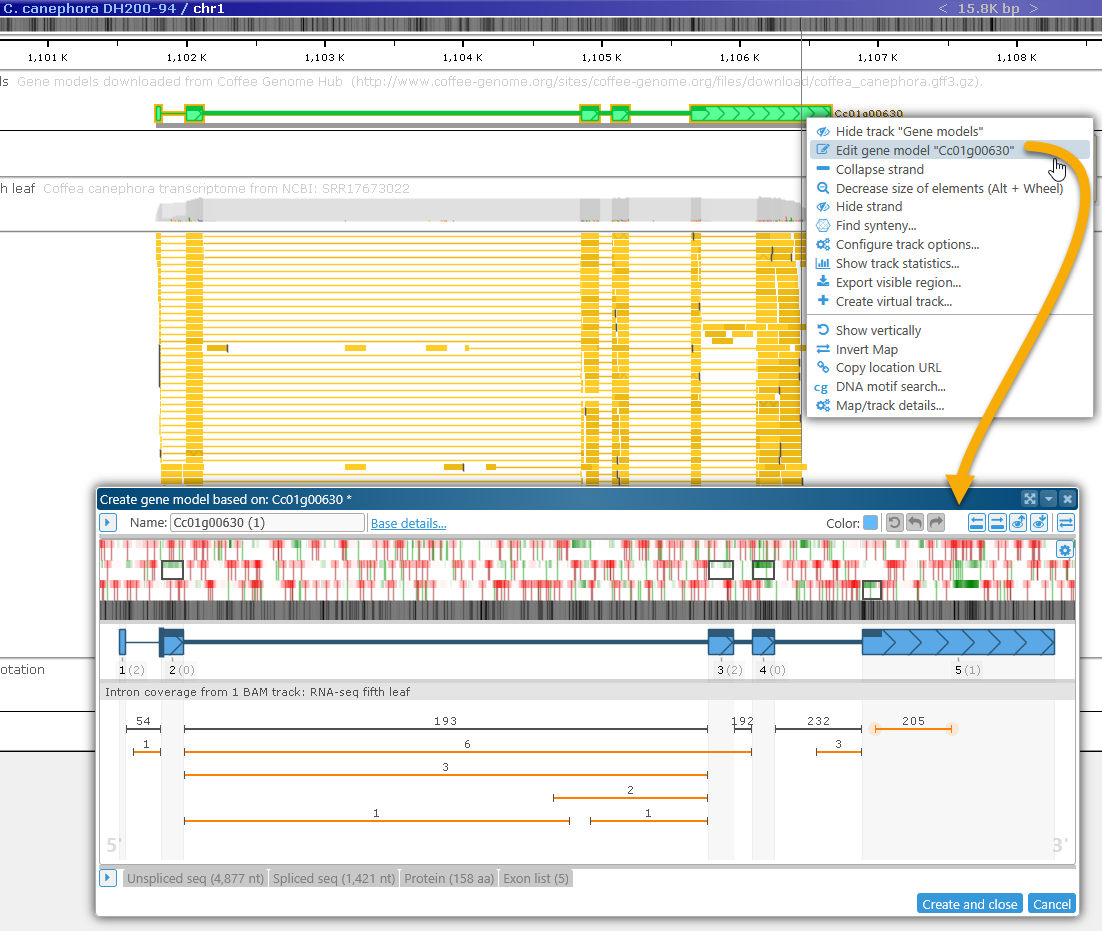
3: Examine evidence
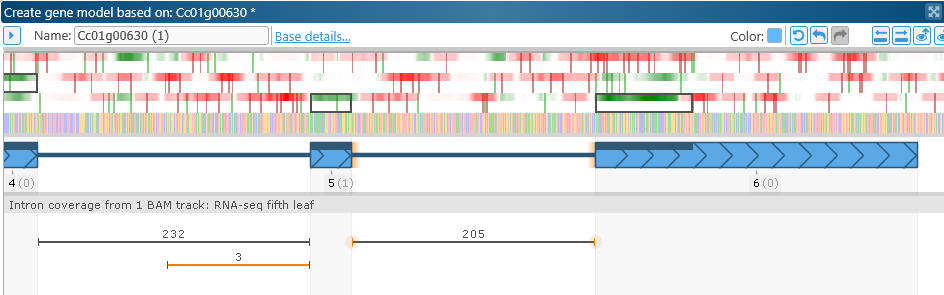
Zoom in on the gene model's 3' UTR. The coding potential plot in that region indicates the presence of a strong protein-coding signal: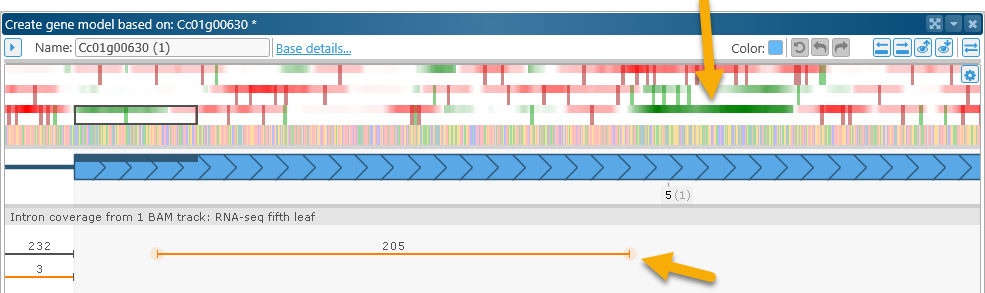
At the same time, the BAM read plot underneath the gene model shows 205 reads supporting the existence of an intron in the UTR. Note that the splice junctions are highlighted in orange, marking them as non-canonical. Zoom in on their locations to verify this: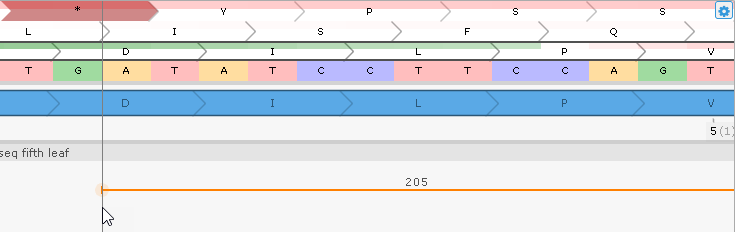
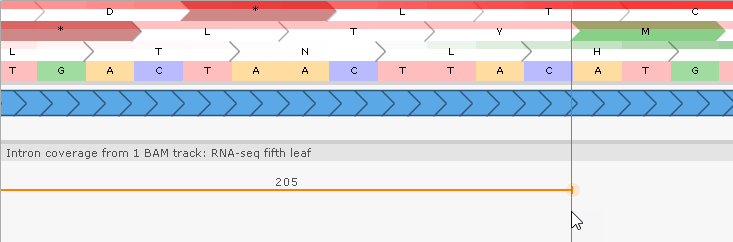
These splice junctions represent an alternative U12 type of introns with flanking AT..AC instead of canonical GT..AG.
4: Make the edit
Zoom out once again, then double-click the intron on the BAM read plot to apply it to the gene model: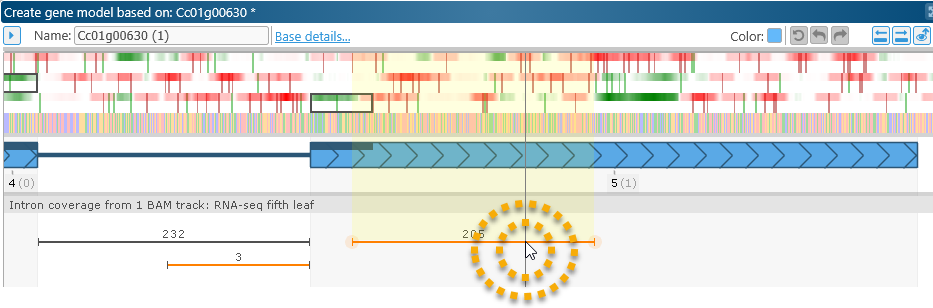
Note that the CDS was automatically adjusted to conform to the new exon structure.
5: Examine the results
Zoom out again to examine the entire model. You can also compare the new model to the old one directly on the map: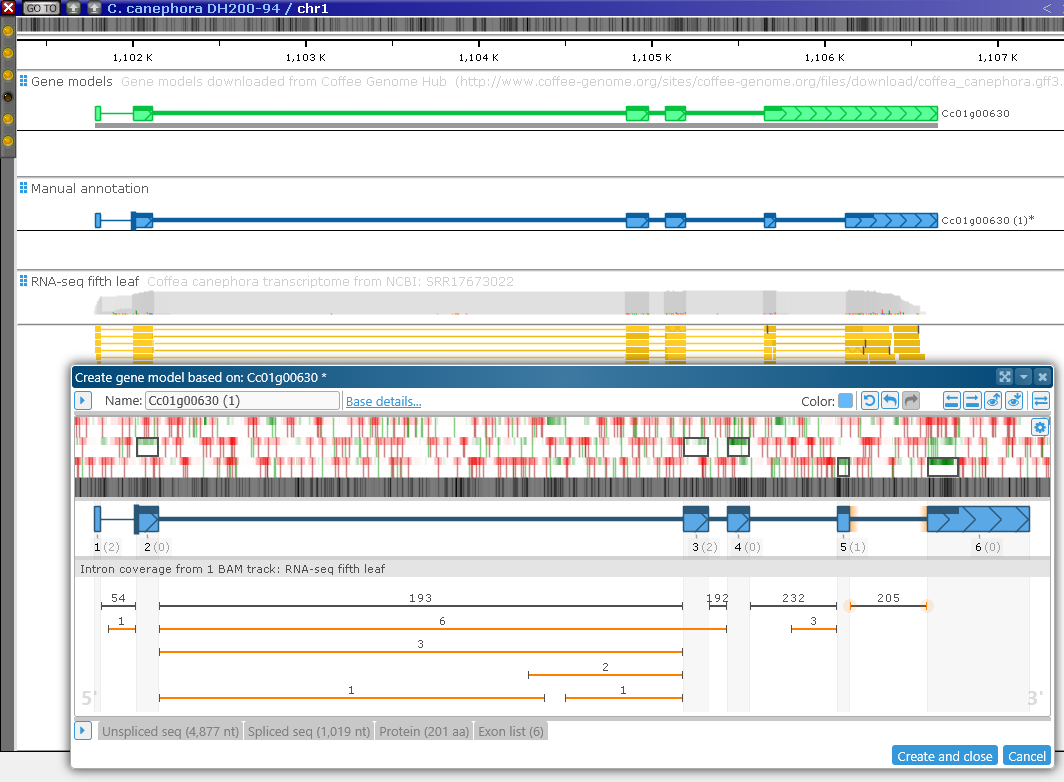
You may want to rearrange the tracks on the map to move the Manual annotation track closer to the original Annotation track containing the unedited model.
6: Validate the resulting protein
In the Edit gene model dialog, click on the Protein tab, and click the  button to open the Run BLAST dialog for the newly edited protein:
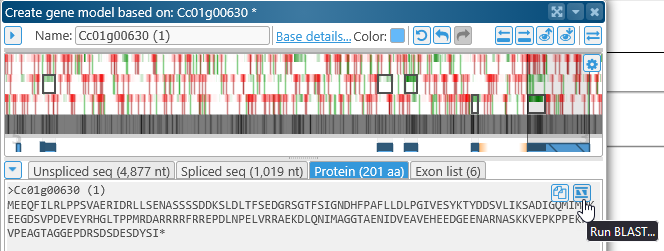
In the Run BLAST dialog, select BLASTP, and choose all of the other Coffee genomes (excluding the original C.canephora) as the query subject:
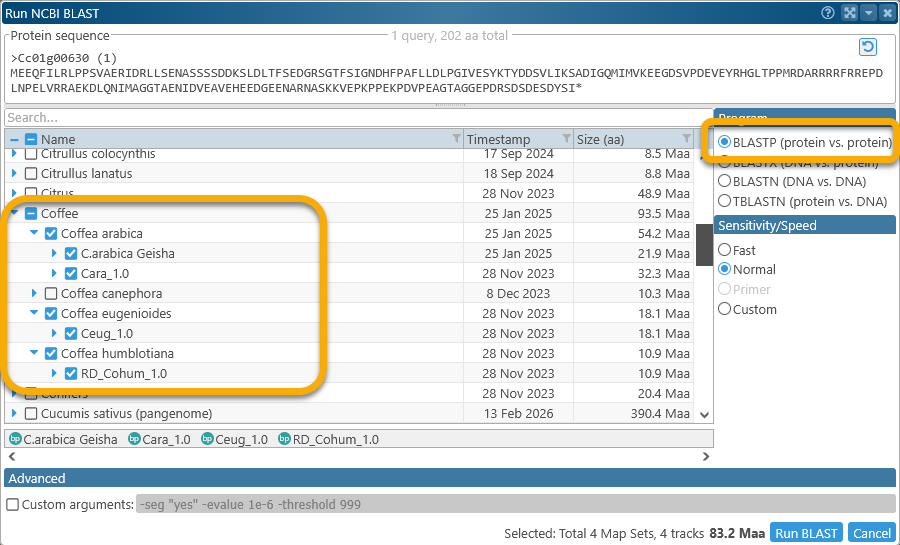
Then, run the BLAST search and wait for the results: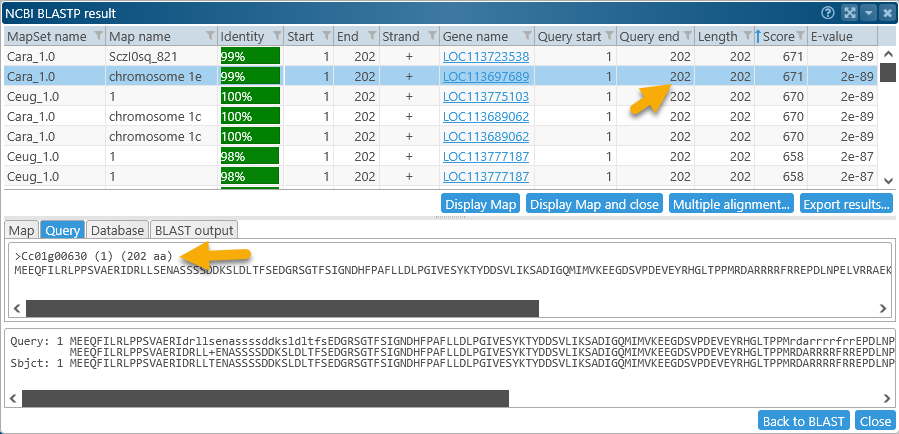
Sort the resulting HSPs by Score, if necessary. Both of the top-scoring HSPs cover the entire query (202 amino acids in length). Select the HSP on chromosome 1e of Coffea arabica (this seems reasonable, as the original gene model was copied from chromosome 1 of C.canephora), then click the Display map and close button to bring the map into view: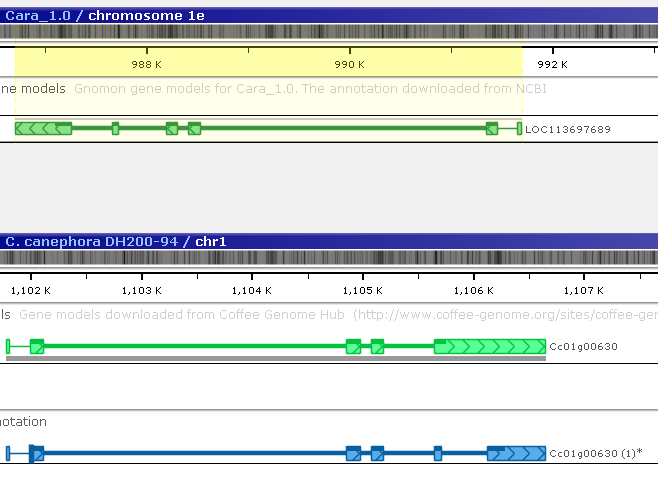
The gene annotation on Coffea arabica that produced the matching protein is highlighted; however, it is located on the opposite strand. Invert the Coffea arabica map to make it easier to compare the two gene models (you may also wish to rearrange the tracks):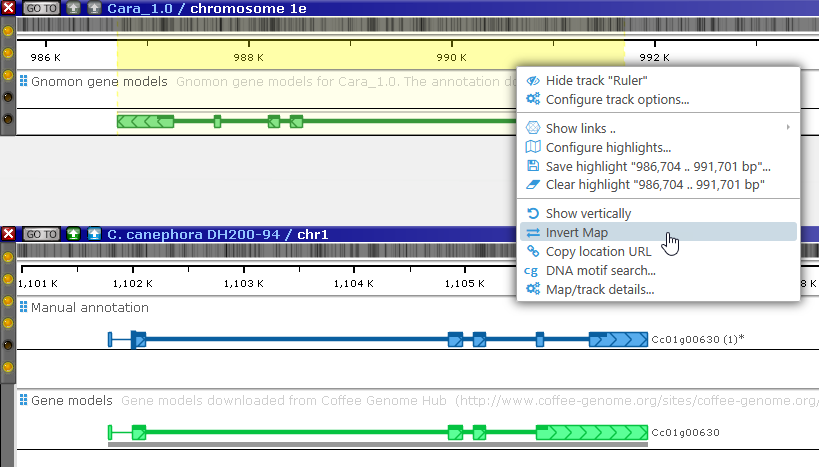
It looks like the two models do match. 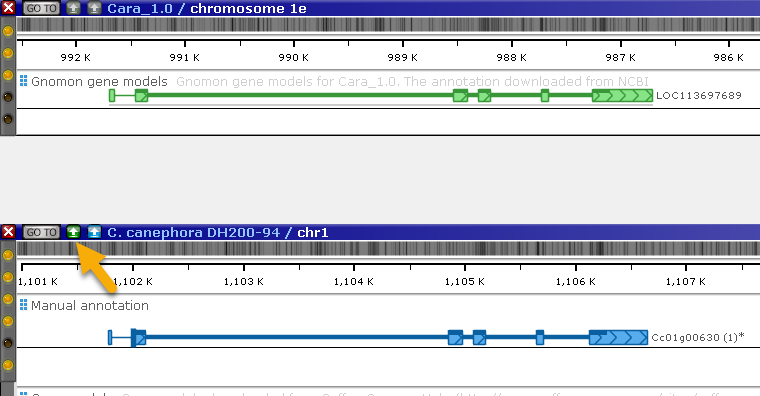
Click the real-time BLASTN button to directly compare the DNA sequences of the two maps: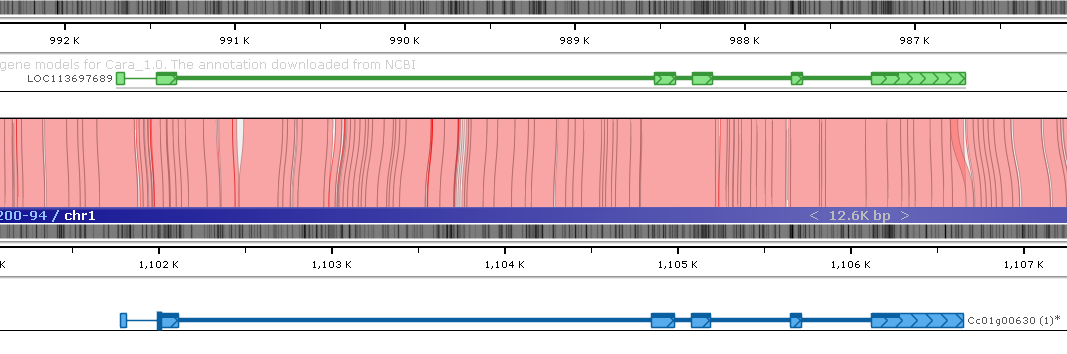
The BLASTN alignment indicates a good match between the maps in the region, thus lending support to the corrected version of the original gene model.
 Copyright © 2009-2025 by Persephone Software. All Rights Reserved.