Web Persephone: The BLAST Results dialog
The BLAST Results dialog displays BLAST output from the Run BLAST dialog in graphical form. Its appearance will be slightly different depending on BLAST program type (e.g. BLASTN vs. BLASTP), but most of the functionality is shared across all BLAST types. For example, the typical BLAST Results dialog for BLASTN looks like this:
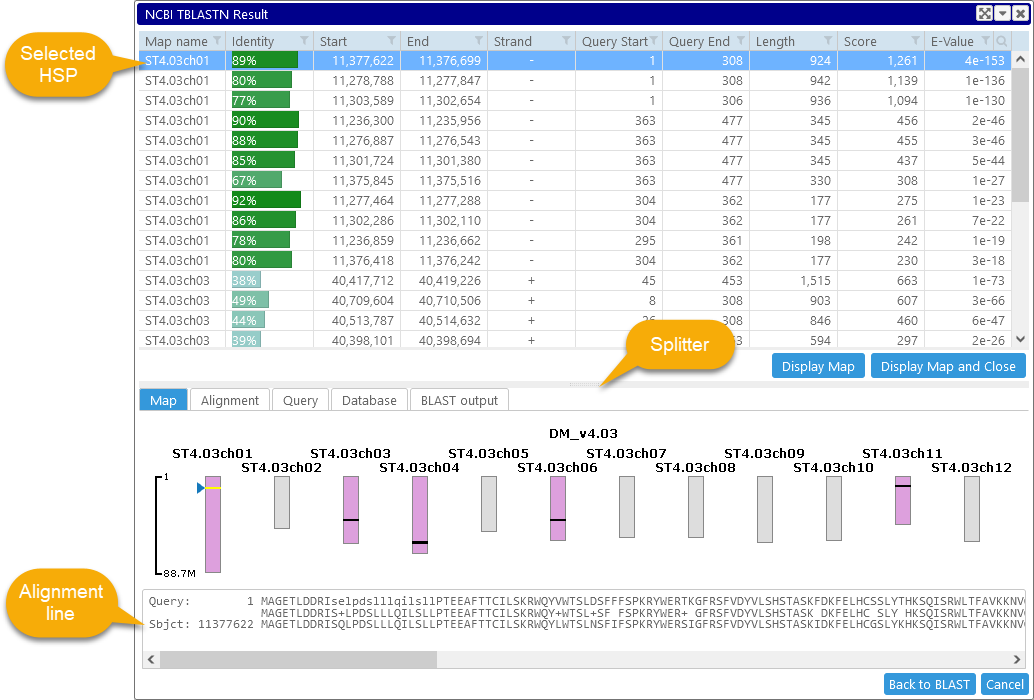
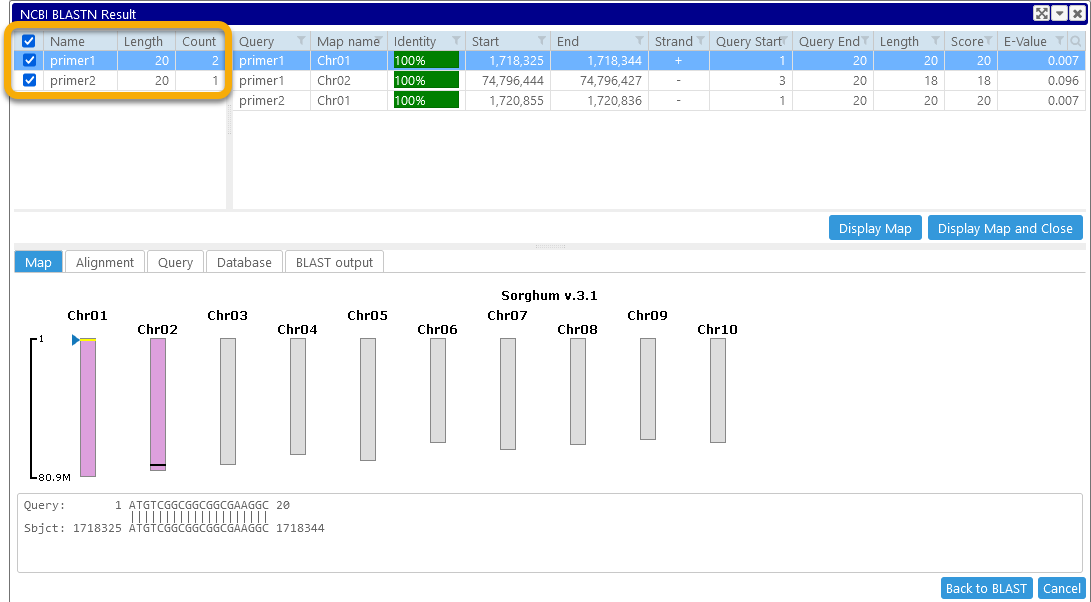
The table at the top of the dialog shows all the HSPs (High-Scoring Pairs) that were produced by BLAST; this table supports all standard sorting and filtering controls. The middle part of the dialog is occupied by several tabs that display more information about the currently selected HSP; these tabs are discussed in more detail below. The bottom part of the dialog contains the alignment line for the currently selected HSP. As usual, you can drag the splitter bar with the left mouse button to resize the panels inside the dialog.
Click the Display Map button to show these HSPs graphically in the main view, as the Real-time BLAST track (you can also click Display Map and Close to close this dialog after revealing the track). The map where the currently selected HSP occurs will open (assuming it wasn't open already) and zoom to the selected HSP; this HSP will also be highlighted.
You can also click the Back to BLAST button to return to the Run BLAST dialog and adjust the query parameters.
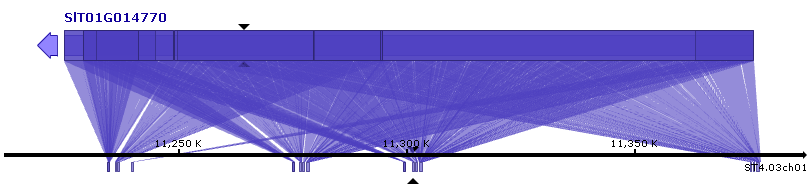
The Map tab
This tab displays the distribution of hits on the current Map Set:
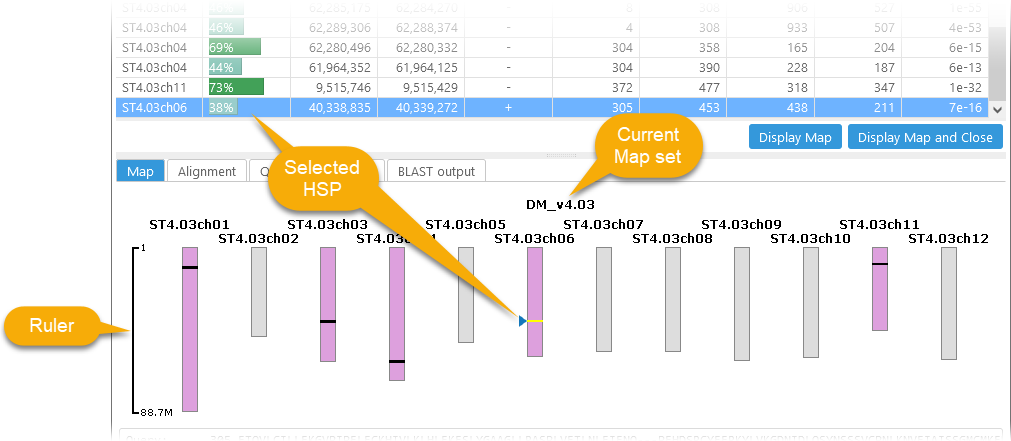
The name of the Map Set is shown at the top, and maps in this Map Set are shown schematically underneath. Chromosomes are shown even if they contain no hits, although chromosomes without hits are grayed out. Scaffolds are only displayed if they contain hits.
You can use the ruler on the left side to roughly gauge the position of an HSP. The HSPs themselves are rendered as black bars; the HSP that is currently selected in the table is highlighted, and marked with a triangle.
The Alignment tab
Note
The Alignment tab is only available for BLASTN and TBLASTN.
This tab displays the matching HSPs graphically:
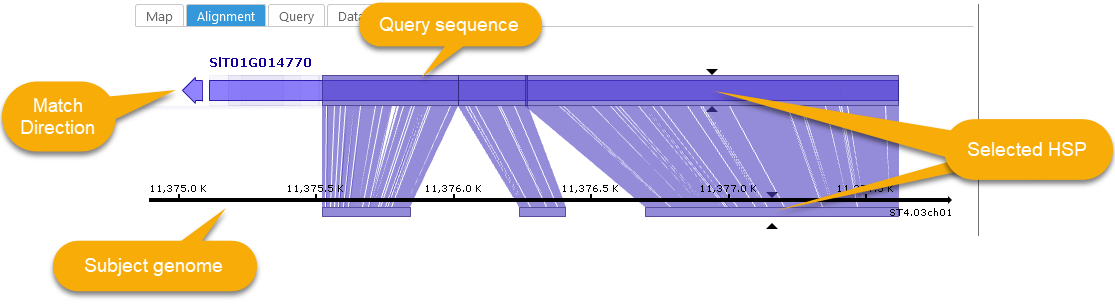
The HSPs are automatically collected into "chains"; in this example, the selected HSP is part of a chain with two others (possibly indicating that they match gene model exons on the target genome). The query sequence is displayed schematically at the top, and the target genome is shown on the bottom. The arrow next to the query indicates match direction; left-facing if the match is on the reverse strand, and right-facing if it is on the forward strand. The currently selected HSP is indicated by black triangle marks. The matching portions of each HSP on the query and the subject are connected by ribbons; these ribbons will have gaps in them if the alignment contains mismatches or insertions/deletions:

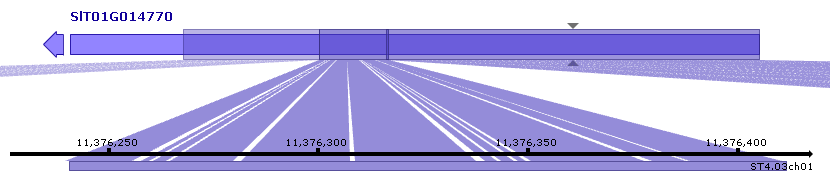
You can drag the alignment with the left mouse button to pan the view, and you can roll the mouse wheel to zoom in or out. For example, you could zoom in to examine an individual HSP in more detail:
Or zoom out to view all the matches on the current map:
You can also click an individual HSP on the genome to select in in the table at the top:
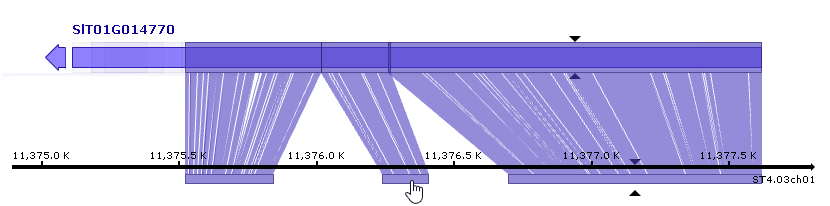
Conversely, select an HSP in the table to zoom in on it in the Alignment tab.
The Query tab
This tab simply displays the query sequence of the currently selected HSP:
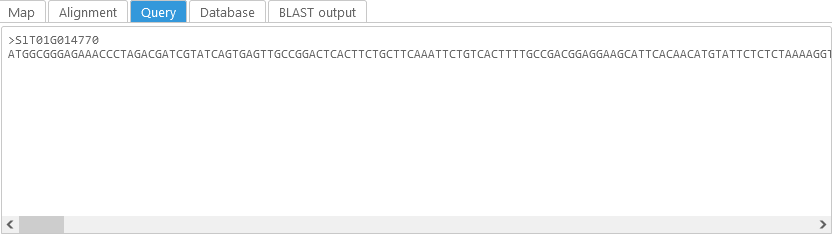
This can be informative if you ran BLAST with multiple queries.
The Database tab
Similarly, this tab displays statistics about the subject database of the currently selected HSP:

This can be informative if you ran BLAST against multiple Map Sets.
The BLAST output tab
This tab displays the raw BLAST output file:
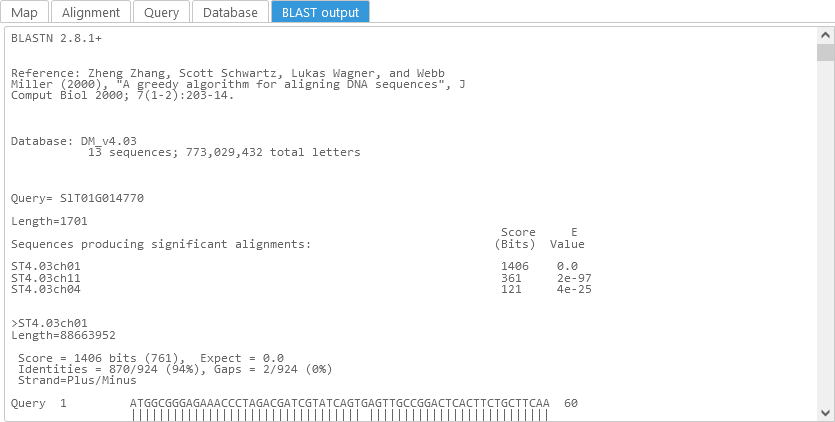
Select an HSP in the table at the top to quickly scroll to its location in the BLAST output file. If the BLAST query produced no hits, the raw output file may contain diagnostic output from the BLAST command-line tool explaining the reason.
Multiple Queries
You can enter multiple sequences on the Run BLAST dialog; if you do so, make sure to give each sequence a unique name in the FASTA header. For example, you could enter two short primers for BLASTN:
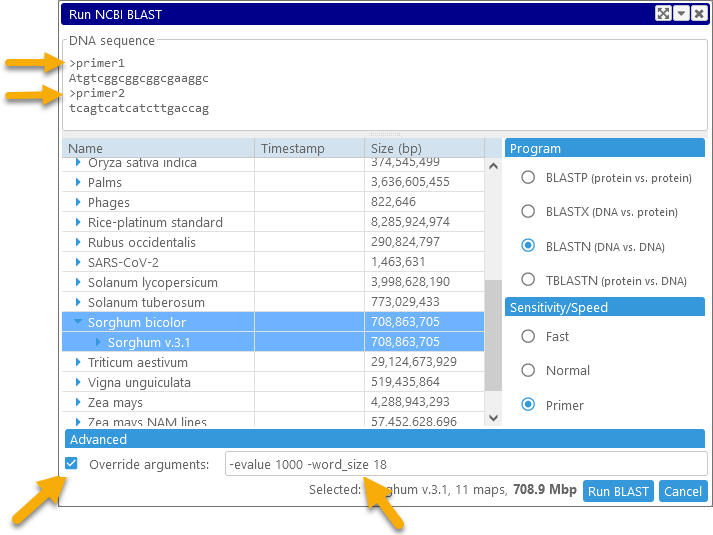
Note
In this case, the primers are only 20 nucleotides in length, and thus the word_size parameter should be set to 20 or lower; otherwise, BLAST will discard the query sequences as being too small. Setting the word_size to 18 allows for mismatches.
On the BLAST Results screen, the table of HSPs will contain an additional section in the upper-left, listing each query, as well as the number of times that query produced a hit:
You can uncheck a checkbox next to a query to hide it from the BLAST results:
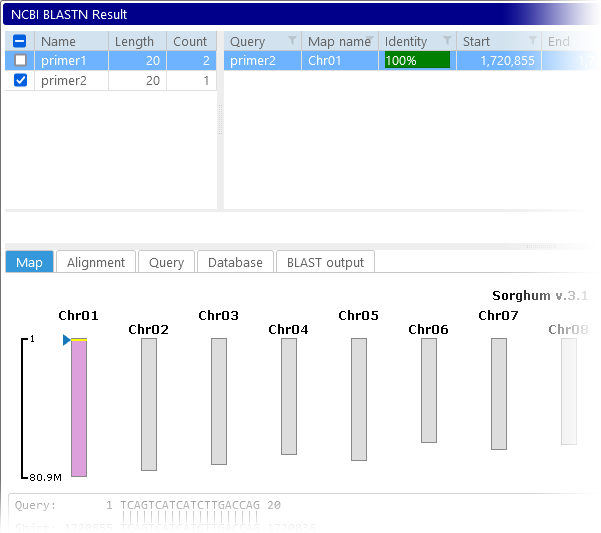
You can also click the tri-state checkbox in the column header to quickly toggle all queries on or off. When you click the Display Map button, the hits from all of the enabled queries will be shown on the same Real-time BLAST track:

 Copyright © 2009-2025 by Persephone Software. All Rights Reserved.