Web Persephone: Annotation Transcripts view
This view (accessible from the Annotation Details dialog) compares all transcripts in the locus of the selected annotation:
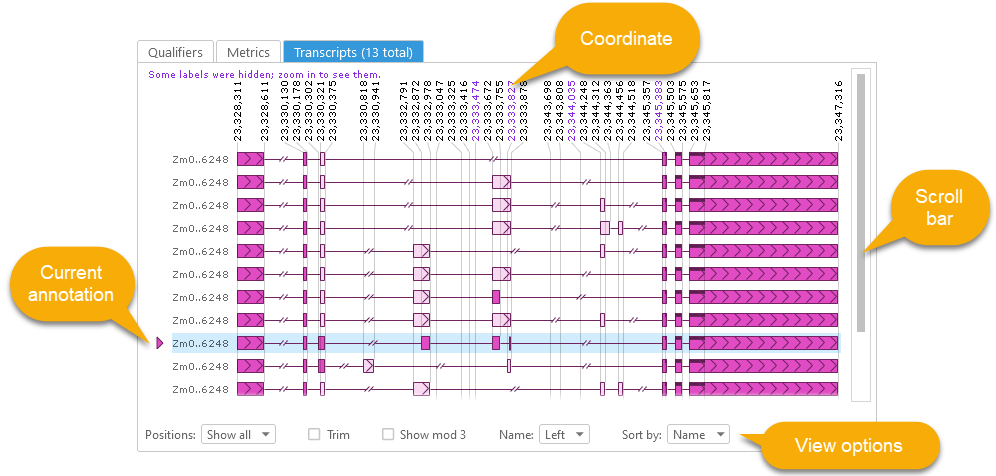
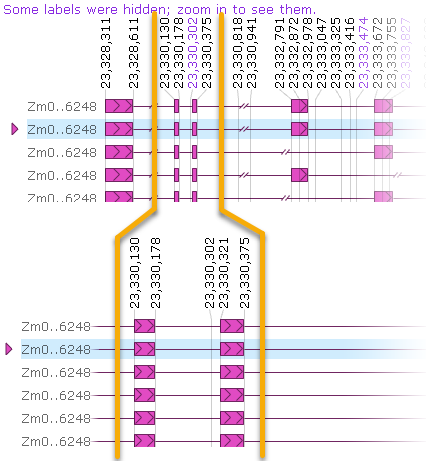
All annotations in the locus are shown in this view; a scroll bar appears on the right side of the screen when there are too many annotations to fit on the screen. The current annotation is marked with a triangle and a blue highlight; you can click any other annotation in this view to open its own Annotation details dialog. As in the metrics view, some introns may be abbreviated (with the  symbol) to save space. The position labels at the top of the view show exon and CDS coordinates, attached to vertical reference lines.
Exons are shown in a darker color when their coordinates match the currently selected transcript; any exons whose coordinates differ between from the current transcript will be shown in a lighter color. You can roll the mouse wheel to zoom the view, in order to see the differences more clearly:
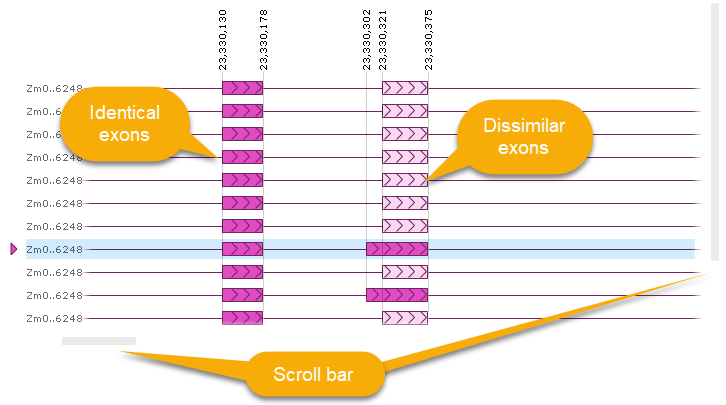
When the view is zoomed in, you can use the horizontal scroll bar to pan it; you can also drag it with the left mouse button (similar to zooming or panning a map).
As you mouse over the view, all exons and introns under the mouse cursor are be highlighted, and their position labels are revealed (while other position labels are temporarily hidden):
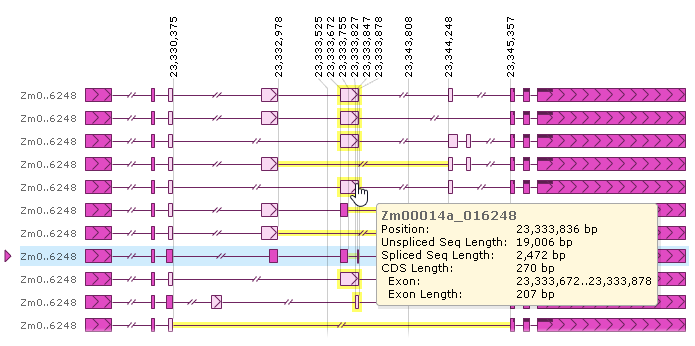
The popup balloon describes the properties of the transcript currently under the mouse cursor, as well as the exact coordinates of the fragment currently under the cursor (e.g. the exon start/end coordinates and its length).
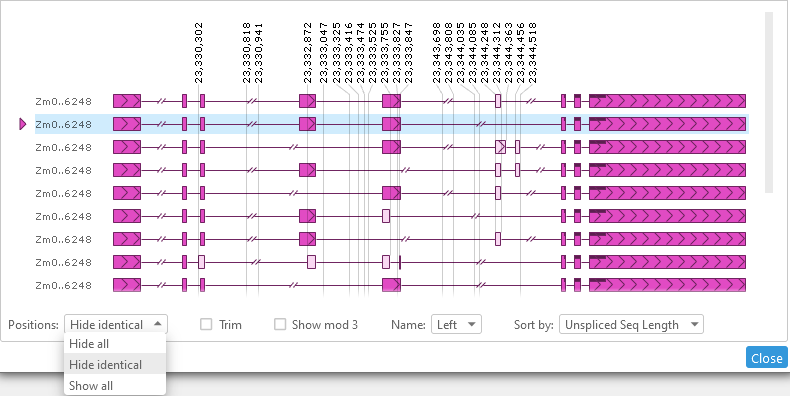
You can use the view options toolbar at the bottom to further customize the view:

Position labels
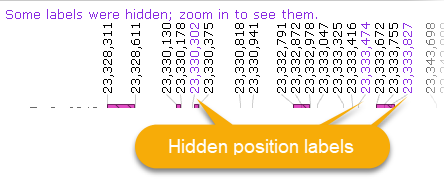
By default, all position labels are shown at the top; if there are too many labels to fit on screen, some of them will be hidden to save space. In this case, the places where such labels were hidden will be highlighted in a light pink color:
As mentioned in the prompt at the top, you can zoom in (by rolling the mouse wheel) to reveal the hidden labels:
In addition, you could select Hide identical from the Positions dropdown menu. In this case, position labels will be hidden if all transcripts agree on their coordinates:
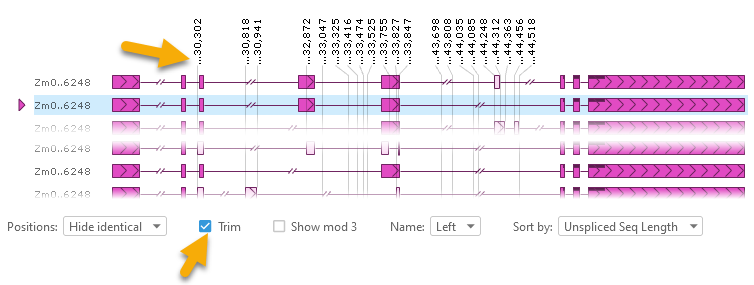
Alternatively, you could select Hide all to simply hide all the position labels. In addition, you could check the Trim checkbox to abbreviate the labels, hiding any leading digits that are the same across all labels:
Finally, check the Show mod 3 checkbox to display the remainder of dividing the label's coordinate by 3; this can be useful when monitoring reading frames:

Transcript names
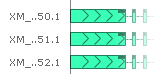
By default, transcript names are shown to the left of each transcript, and are abbreviated to save space:
However, you can display the transcript names in the middle of the view, without abbreviation:
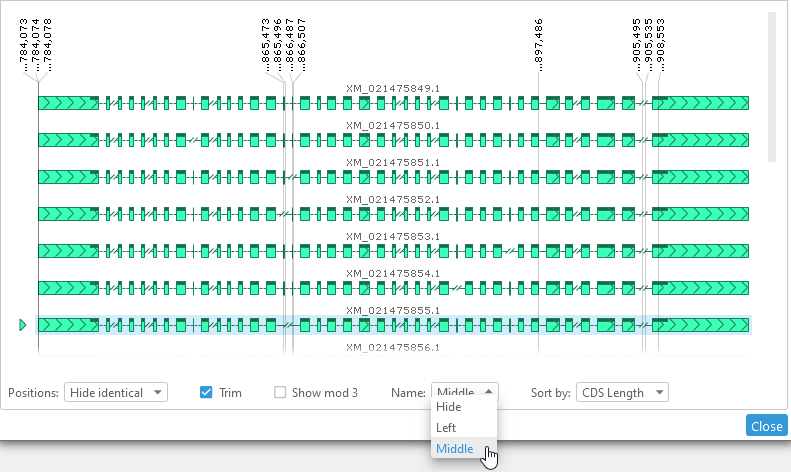
Alternatively, you can hide the transcript names completely.
Sort
By default, transcripts are sorted by unspliced sequence length (longest on top). However, you can also choose to sort them by name (alphabetically):

Alternatively, you can sort transcript by CDS length (longest on top). If multiple transcripts have the same CDS coordinates, you can choose to collapse them (thus ignoring any differences in their UTR coordinates):
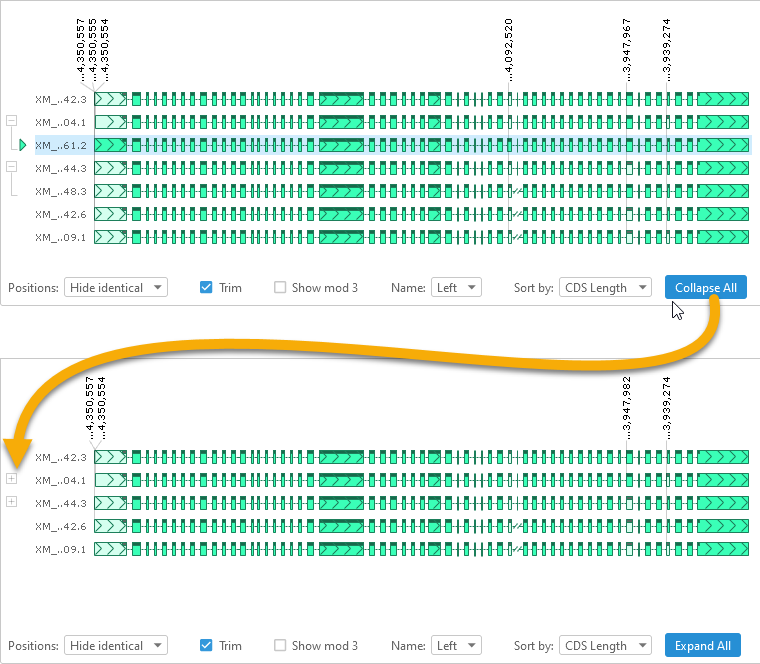
You can also use the  and
and  buttons to the left of each set of transcripts to expand or collapse that set individually.
 Copyright © 2009-2024 by Persephone Software. All Rights Reserved.